Any questions before Tuesday can be answered here. This may be important, as the mission is a one life mission and will need everybody to be switched on to their fullest.
Some notes:
- Each fireteam has an explosives specialist that carries 3 satchel charges instead of a LAT. The USAF security personnel has nothing more heavily armoured than a Humvee on Wake Island.
- PLT also has 1x explosives specialist in place of PLT rifleman
- Every gun is equipped with ERCO sights, giving you superior range. This is countered by American ACOGs, so don’t feel too special.
- Most USAF security personnel does not carry nightvision, only the QRF does. The QRF will most likely originate from the Barracks or the main compound (marked as main objective).
- The intel you require can be found on a researcher’s laptop, or you can just capture the researcher himself, though he will likely be hiding.
- Stealth is only useful in the beginning, once they know you’re there, ditch the suppressors and let them have it.
[spoiler=OPORD]Map: Wake Island
Time: 2300 hours
Weather: Clear
Host: [user avatar=“https://assets-cloud.enjin.com/users/2509934/avatar/small.1584375752.gif” name=“Baegel”]2509934[/user]

OPORD
I Situation:
The American pigs have long stood against Chinese reunification. They sit, fattened by victory from over 80 years ago, believing the world is theirs. They do not hunger like us. Today, all that will change. The middle kingdom has stocked its resources, rearmed, the people are ready. We will strike them on New Years’ Eve, when their bellies are full and their thoughts are at home, ensuring swift victory. Our mandate of Heaven has begun.
Friendly Forces:
[indent][list][] Oriental Sword (Chinese Special Forces)
[] PLT, Alpha, Bravo, Charlie are available.[/list][/indent]
Assets:
[indent][list]
[*] 1x UCAV Sentinel Drone
[/list][/indent]
Enemy Forces:
[indent][list]
[] US Airforce Security Personnel
[] The security forces of Wake Island are fat and lazy, and number to about 100 soldiers.
[/list][/indent]
Civilians:
[indent][list]
[*] Some contractors for construction and civilian duties
[/list][/indent]
II Mission:
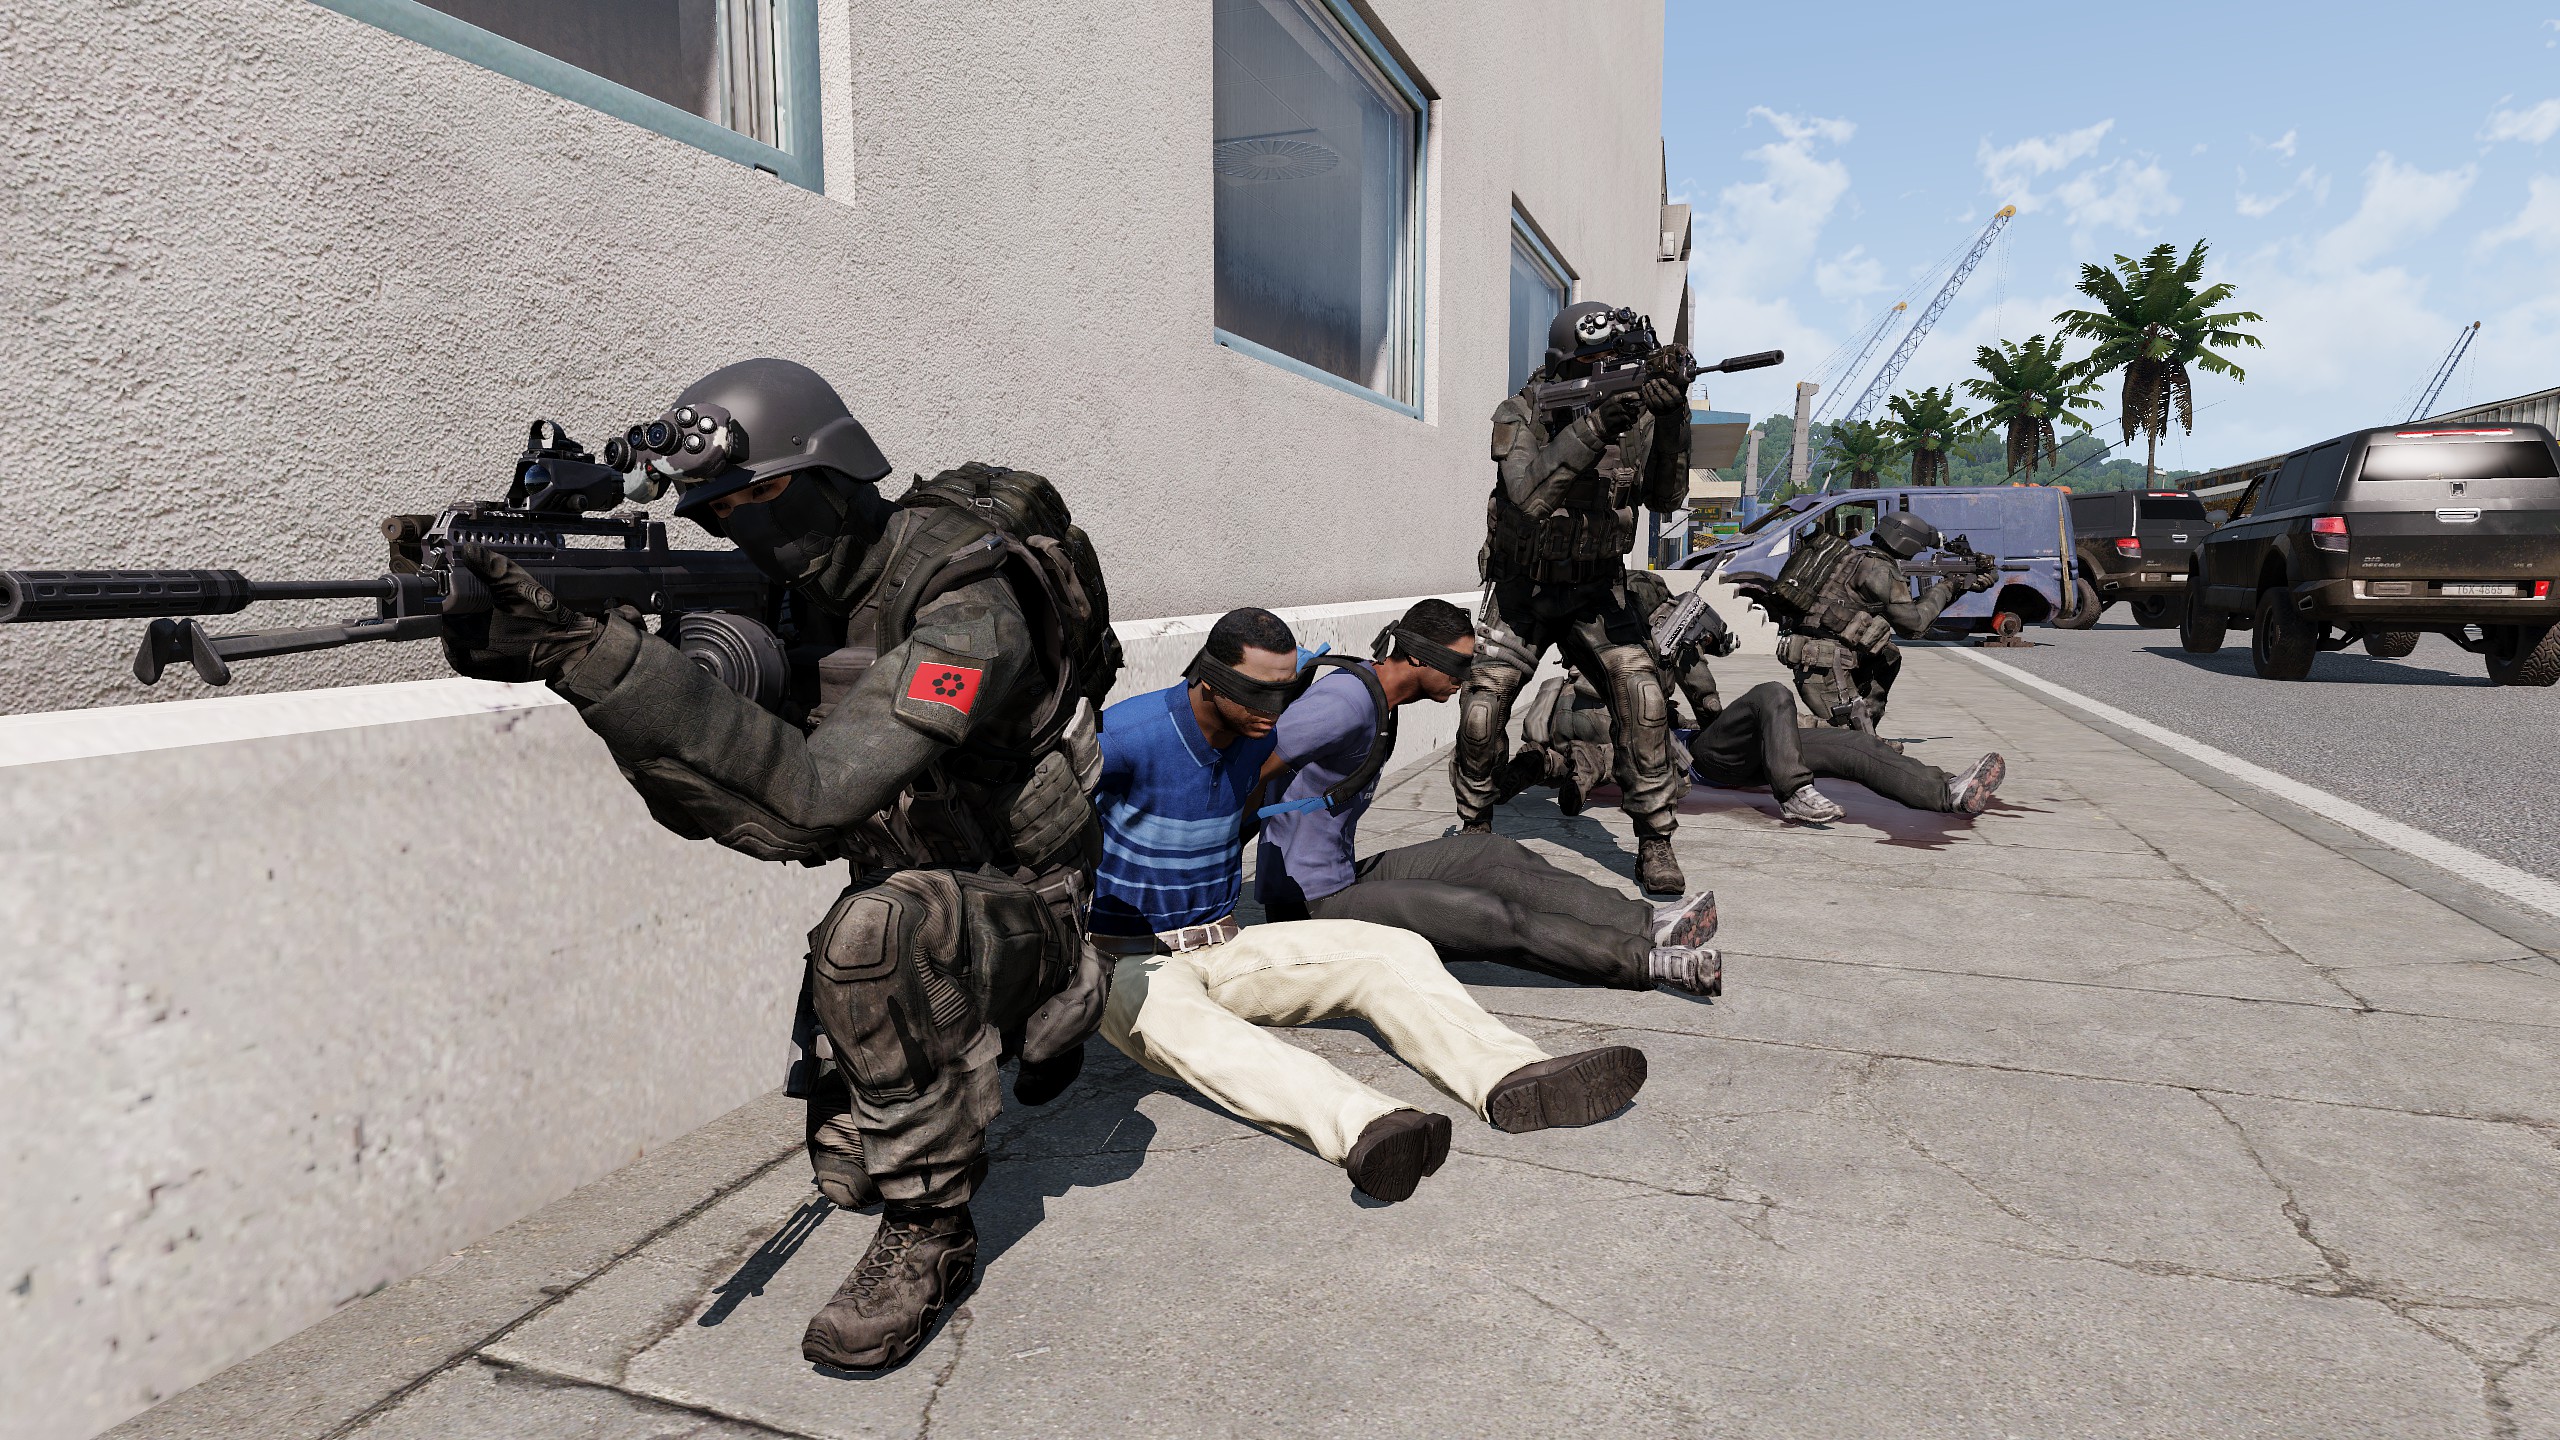
Infiltrate Wake Island along three different arcs, each assigned to a team. Each team has their primary objective, before converging on the main facility.
Alpha Objective:
Rig the power plant and capture the pier near Kuku Point.
Bravo Objective:
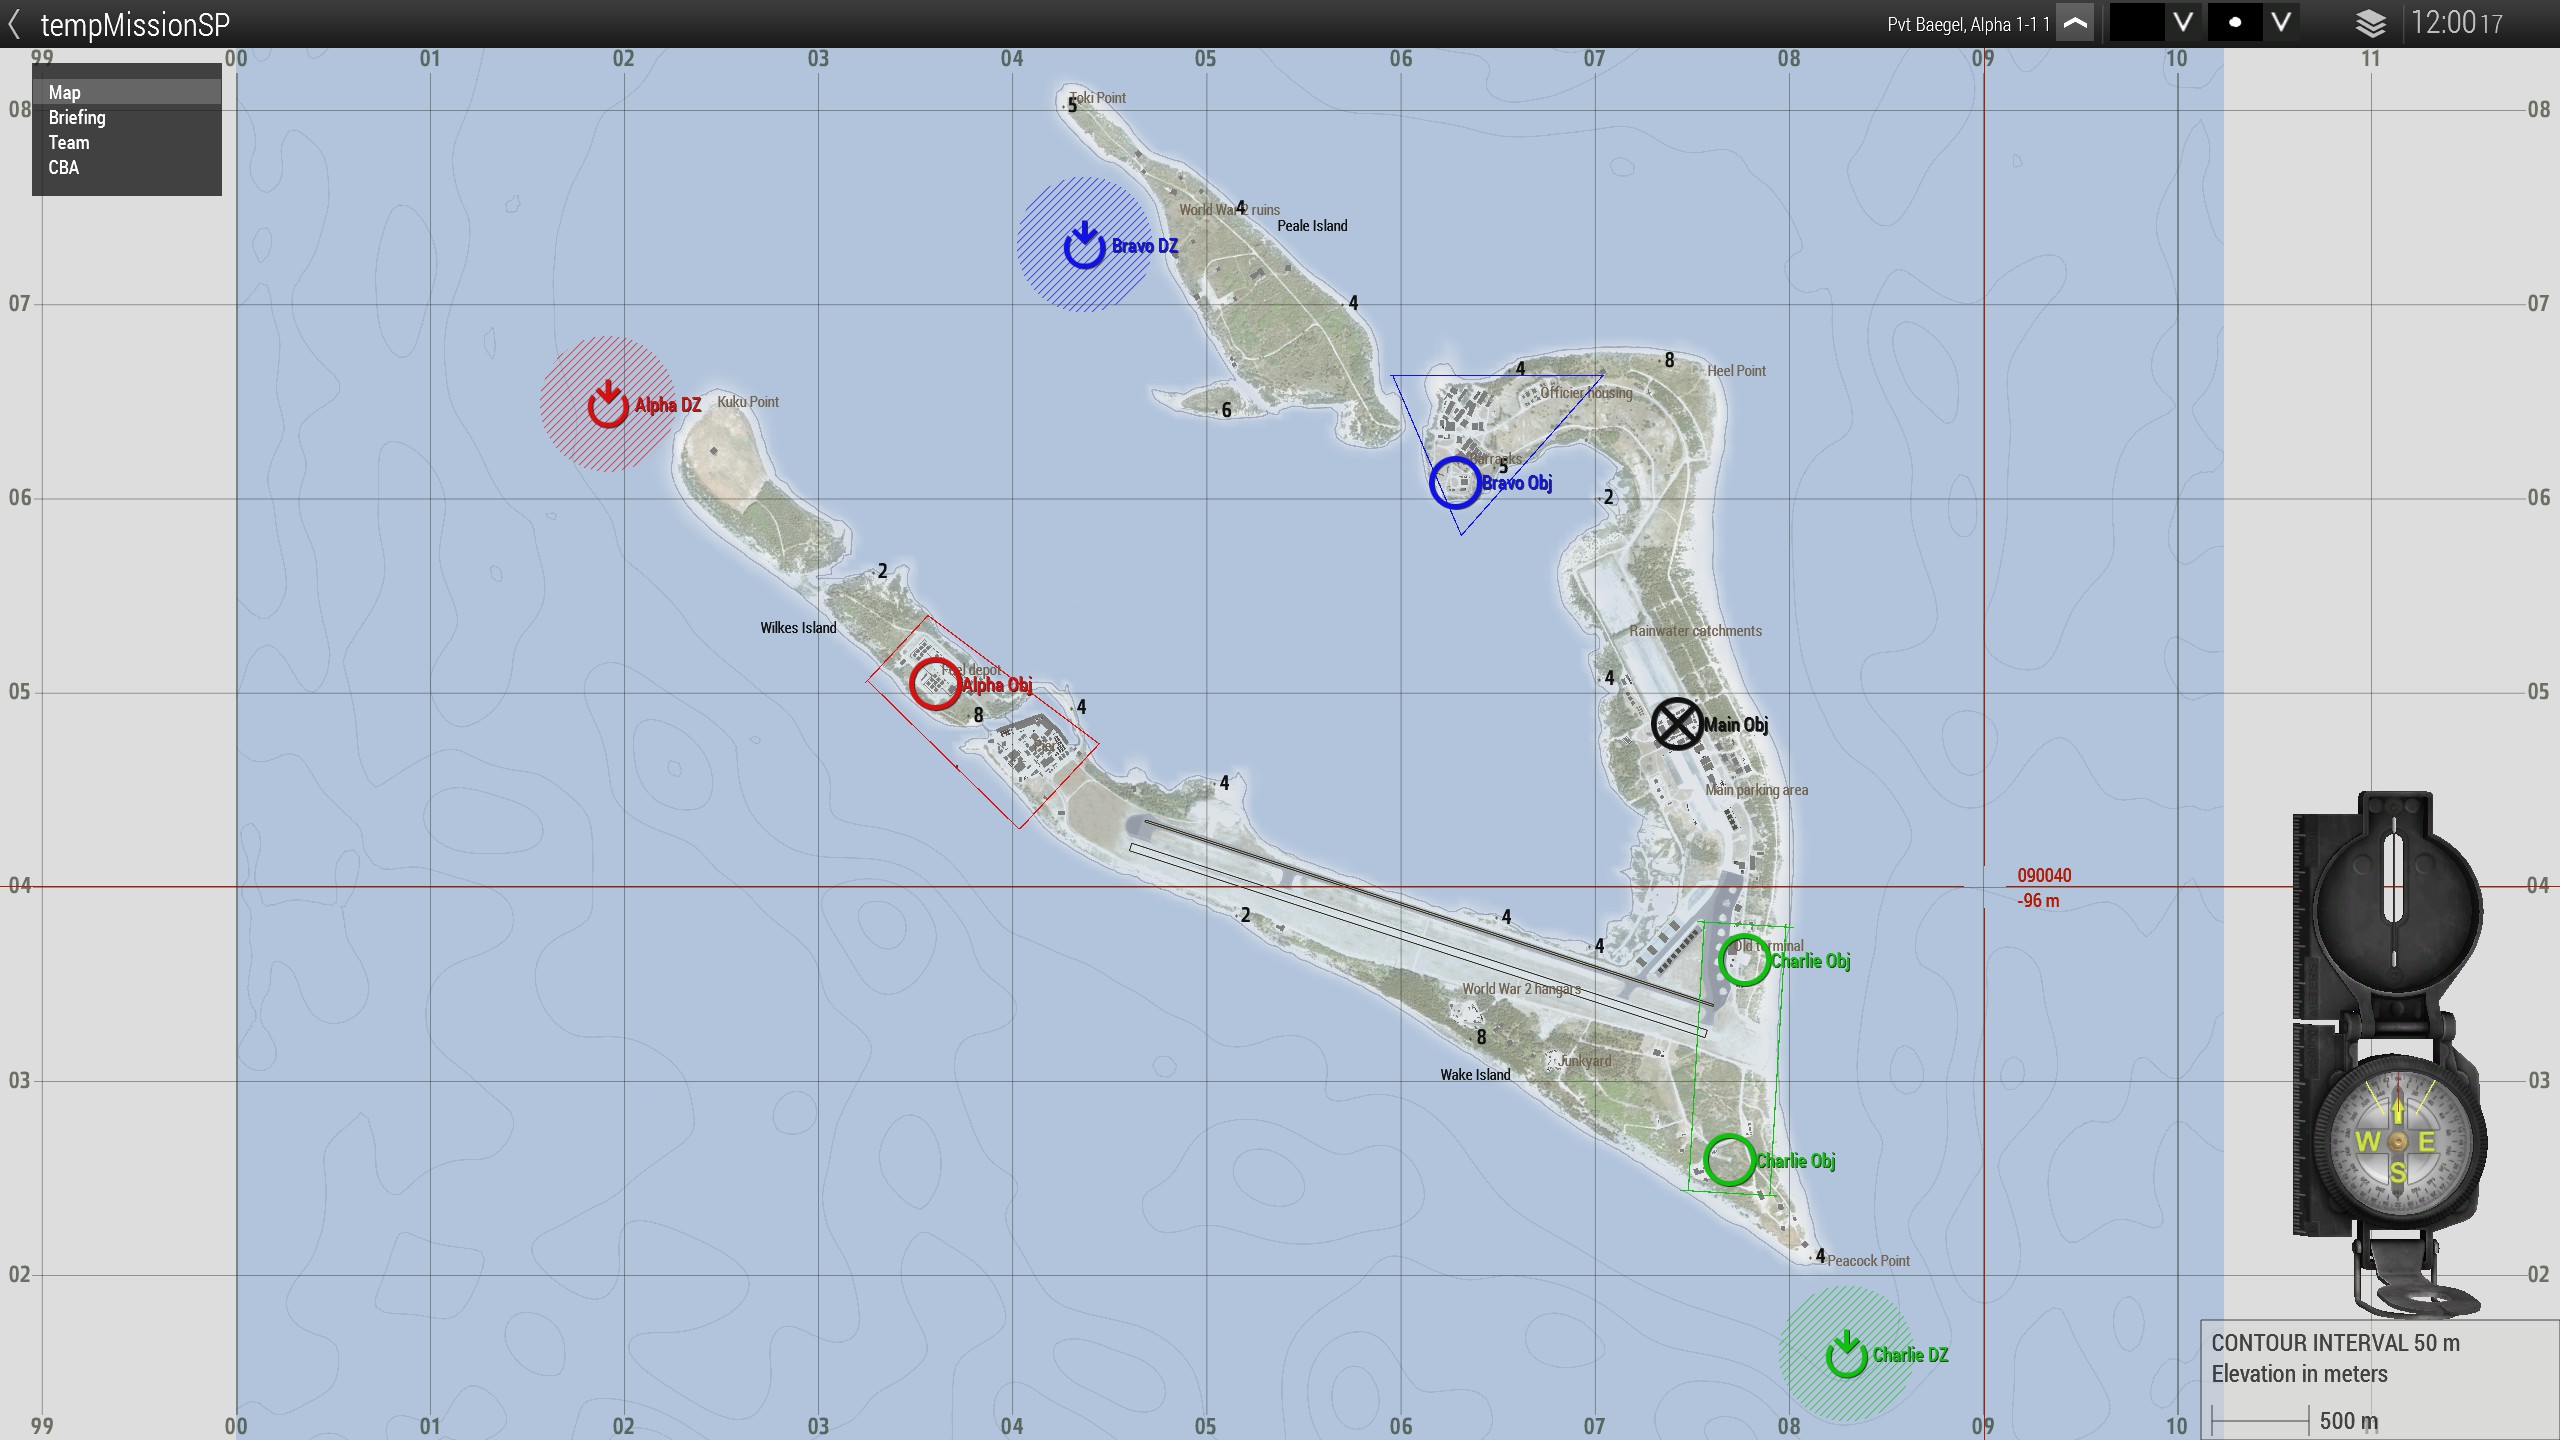
Rig the radar and capture the barracks near Heel Point.
Charlie Objective:
Rig the radar near Peacock Point and the radar near the Old Terminal.
III Execution:
Commander’s intent
[indent][list]
[] Alpha, Bravo, and Charlie are to perform a HALO drop into the waters around Wake Island and begin their infiltration.
[] All three teams are to place their explosives on the designated targets, remaining stealthy as they do.
[] The entire island is in a festive mood, as long as you take each facility quickly the rest should not be alerted to your presence.
[] If the risk is too great, do not reveal yourselves unless necessary. Worry about the explosives first.
[] Once all explosives are placed, all three teams are to converge on the main facility.
[] Alpha team will give the go ahead to trigger explosives.
[] Once explosives are triggered, storm the main facility and gather any intel you can.
[] Once the island is yours, Exfil will happen the next morning.
[/list][/indent]
Movement Plan
[indent][list]
[*] Movement up to PLT.
[/list][/indent]
Fire Support
[indent][list]
[*] None.[/list][/indent]
IV Administration / Logistics:
Resupplying
[indent][list]
[*] Resupply will be dropped with you on your jump.[/list][/indent]
Reinforcements:
[indent][list]
[*] This is a one life mission, there will be no reinsertions.[/list][/indent]
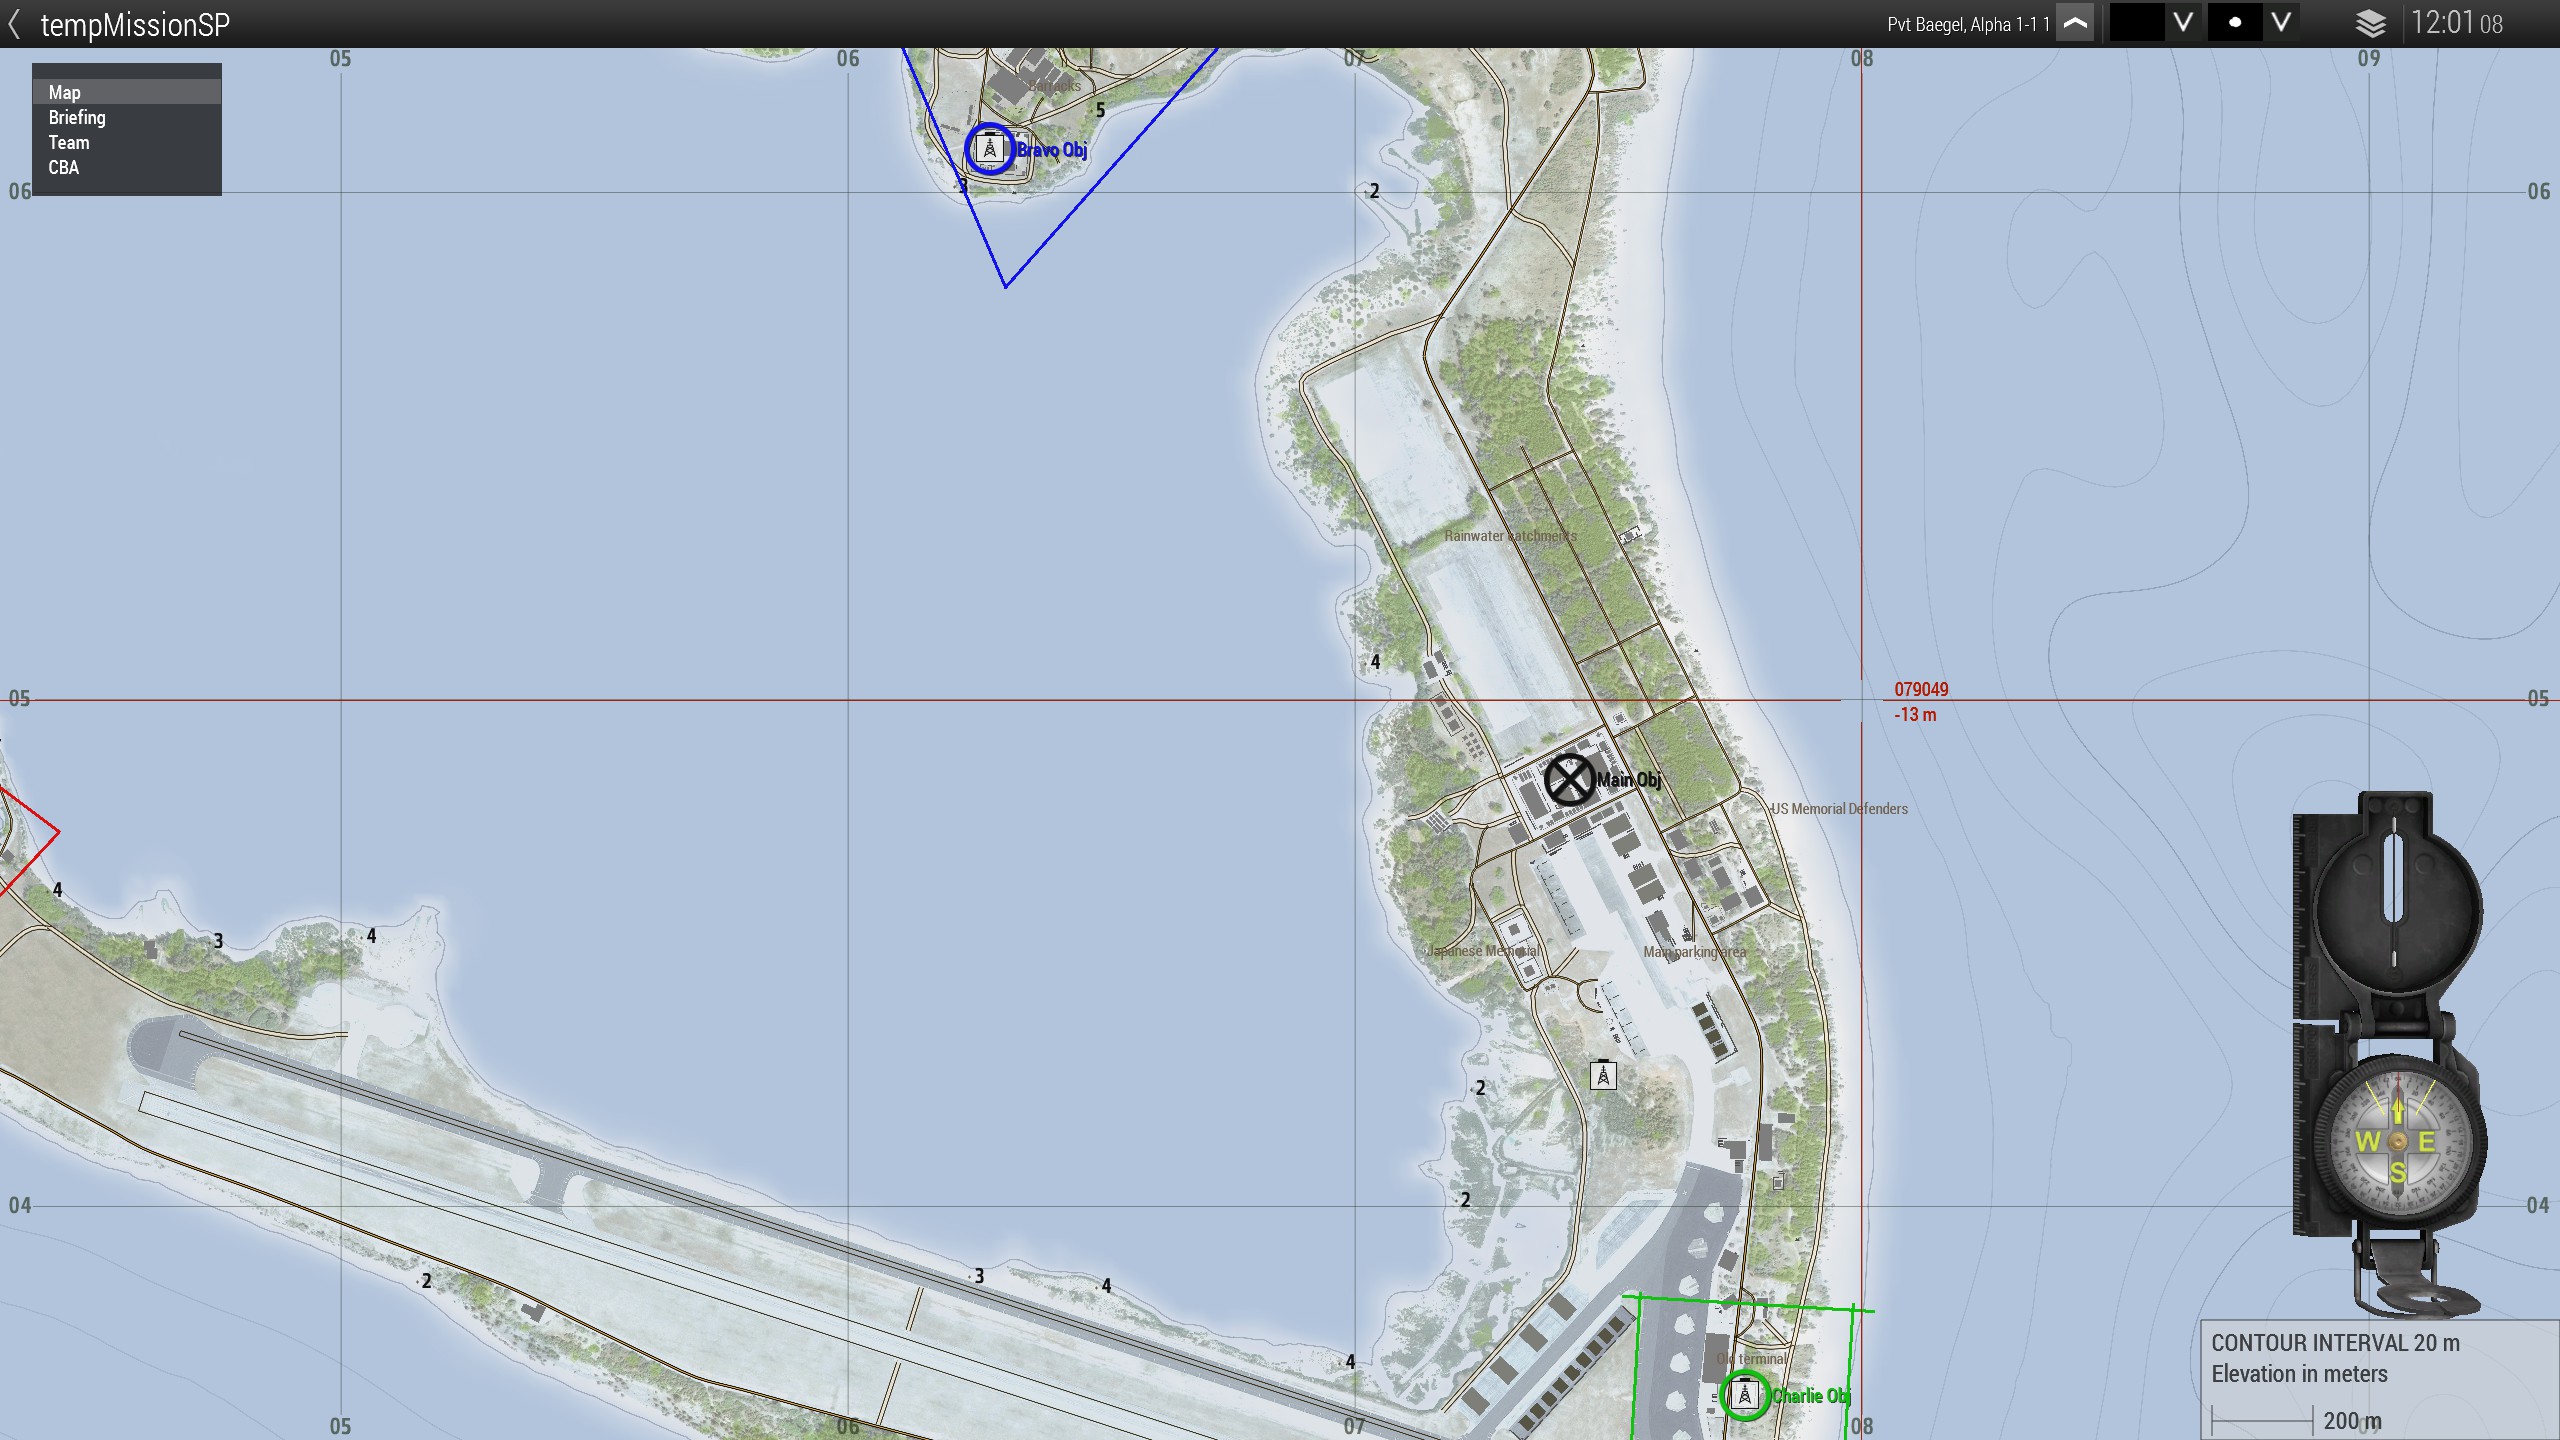
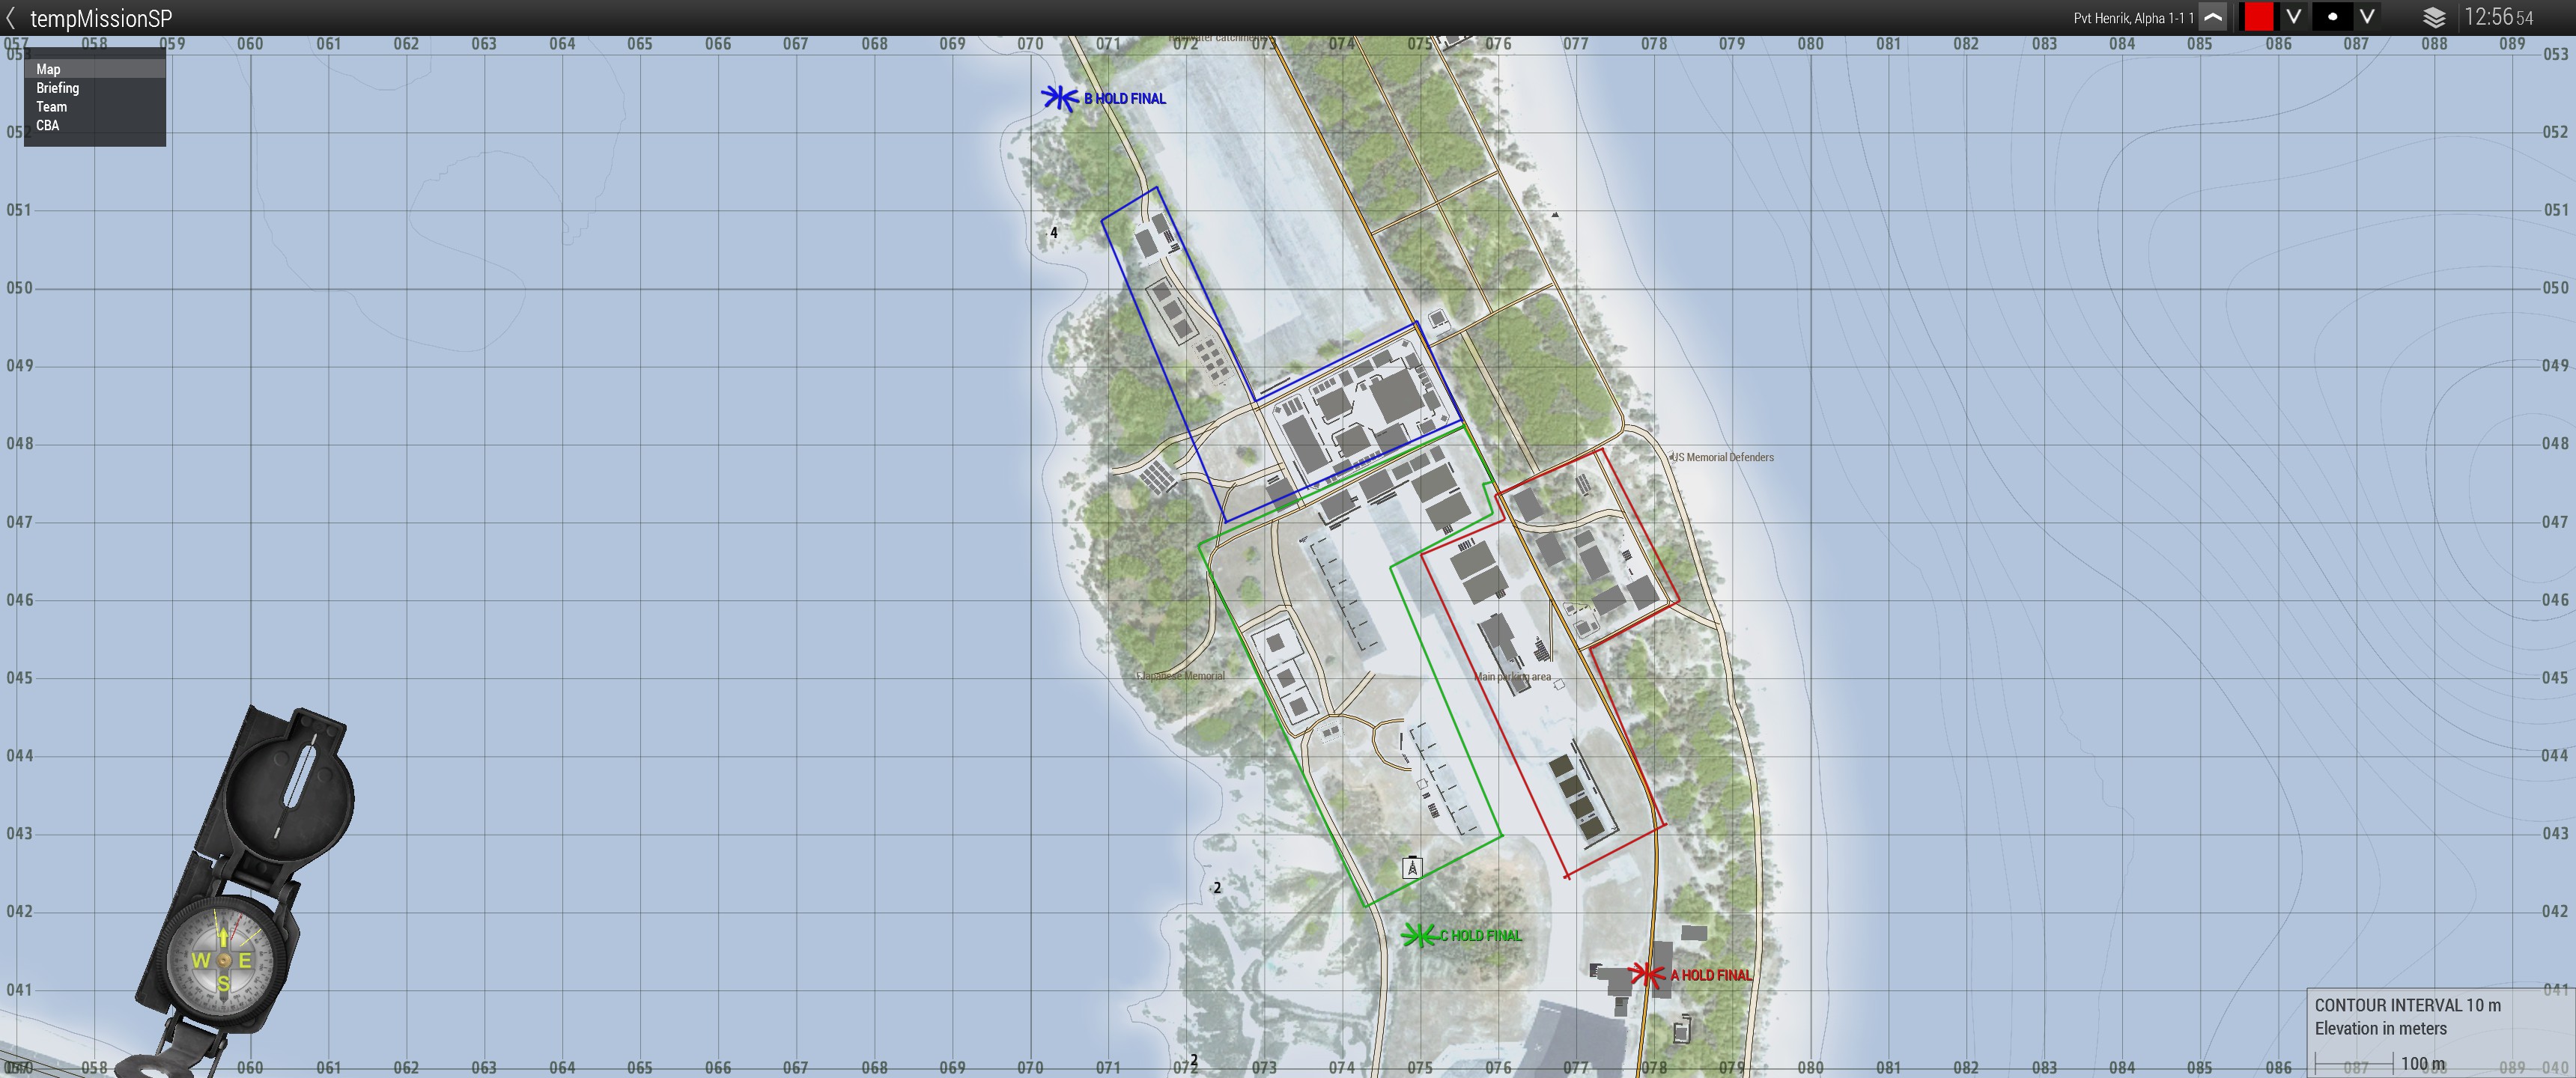
General Area of Operations:
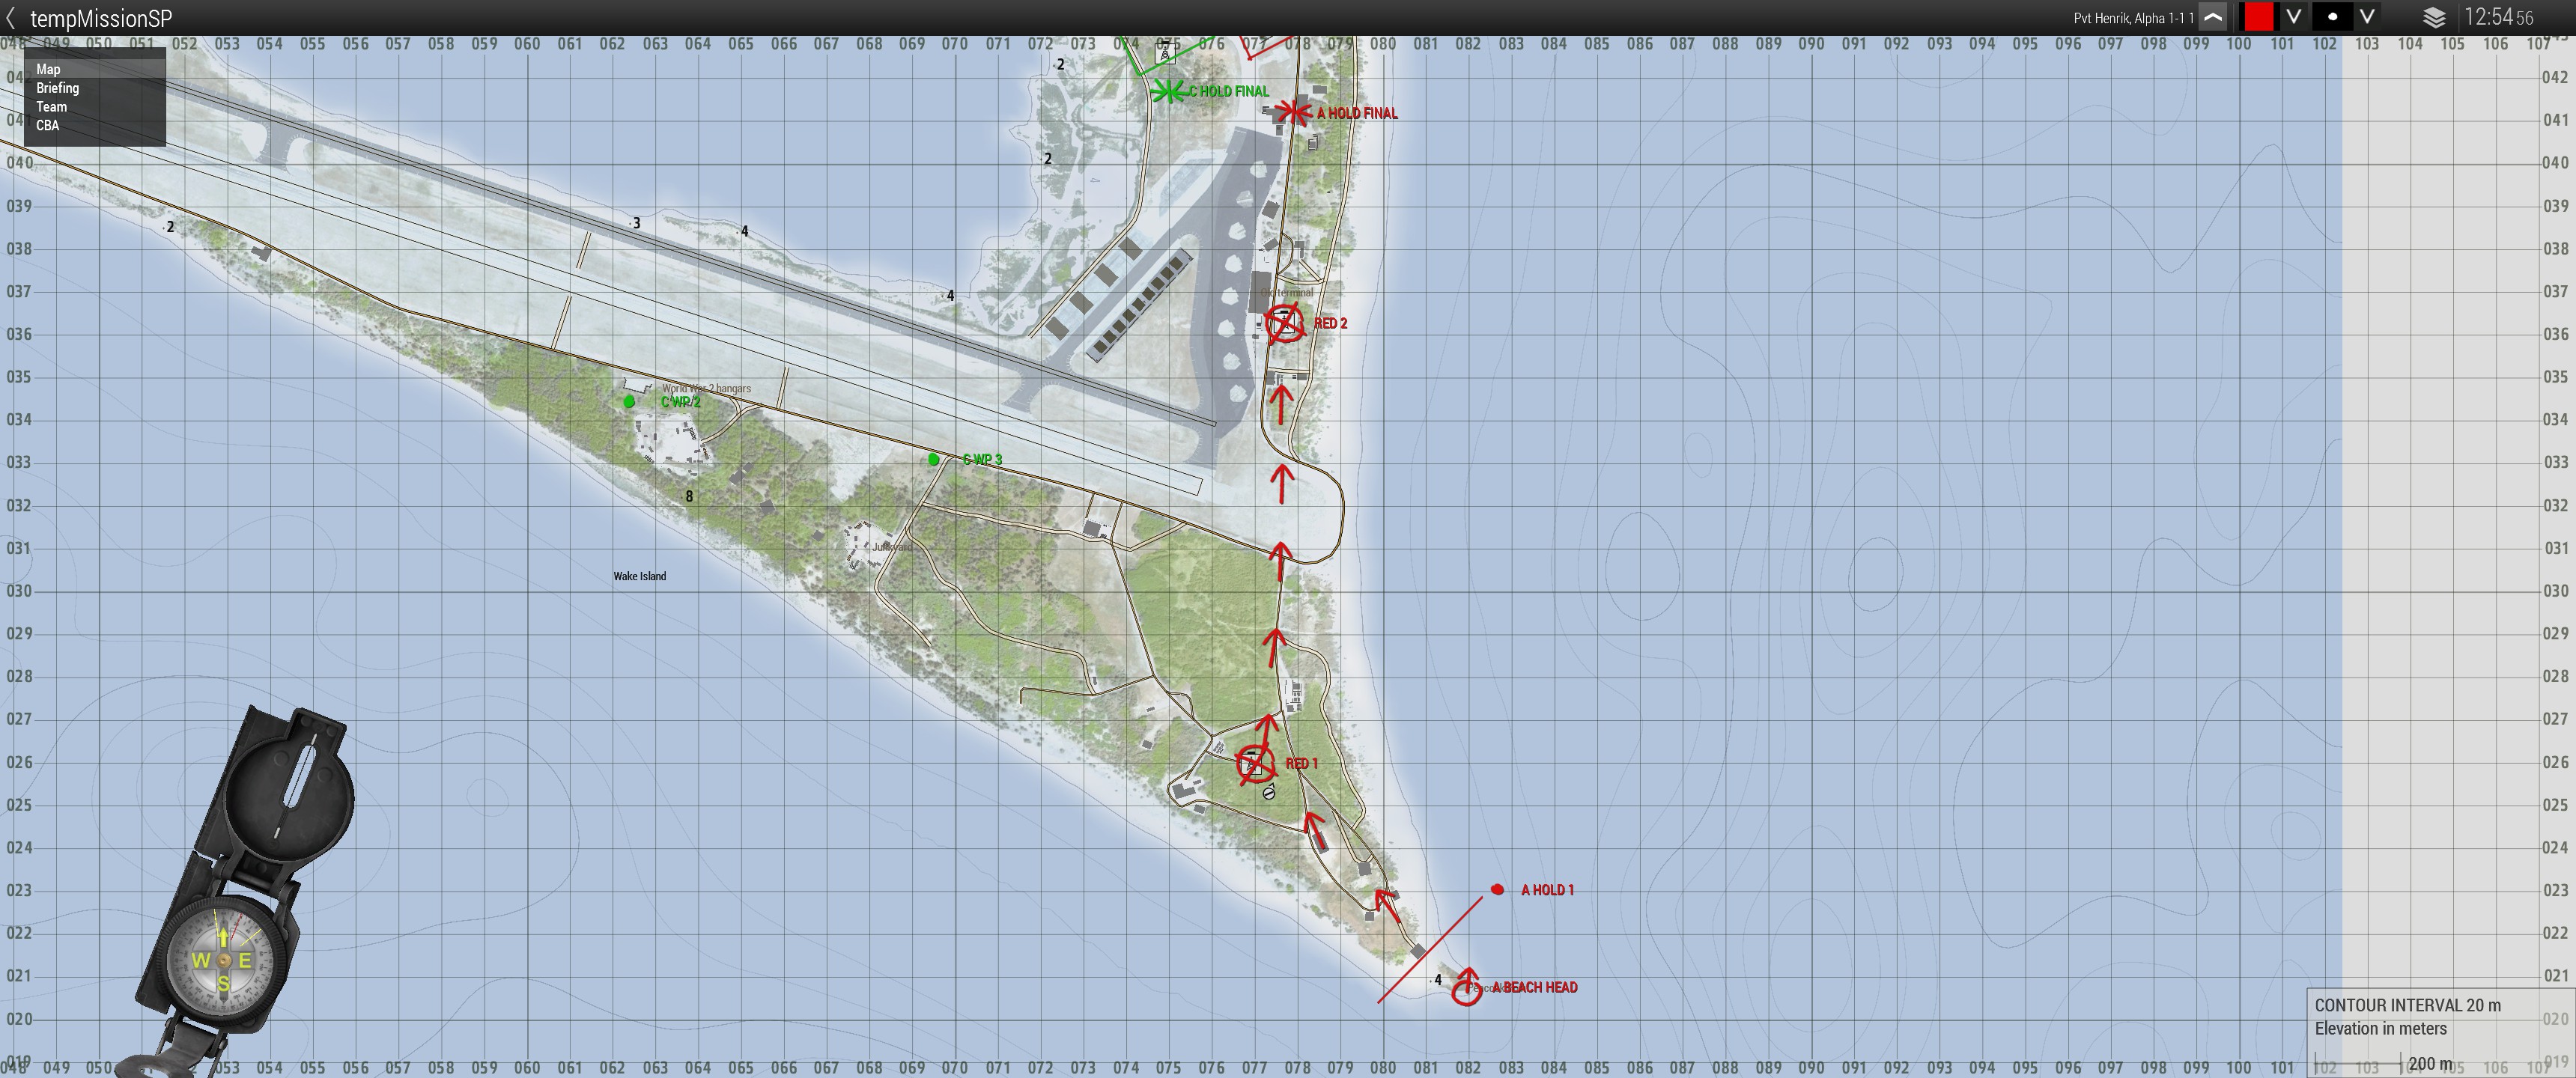
Alpha AO:

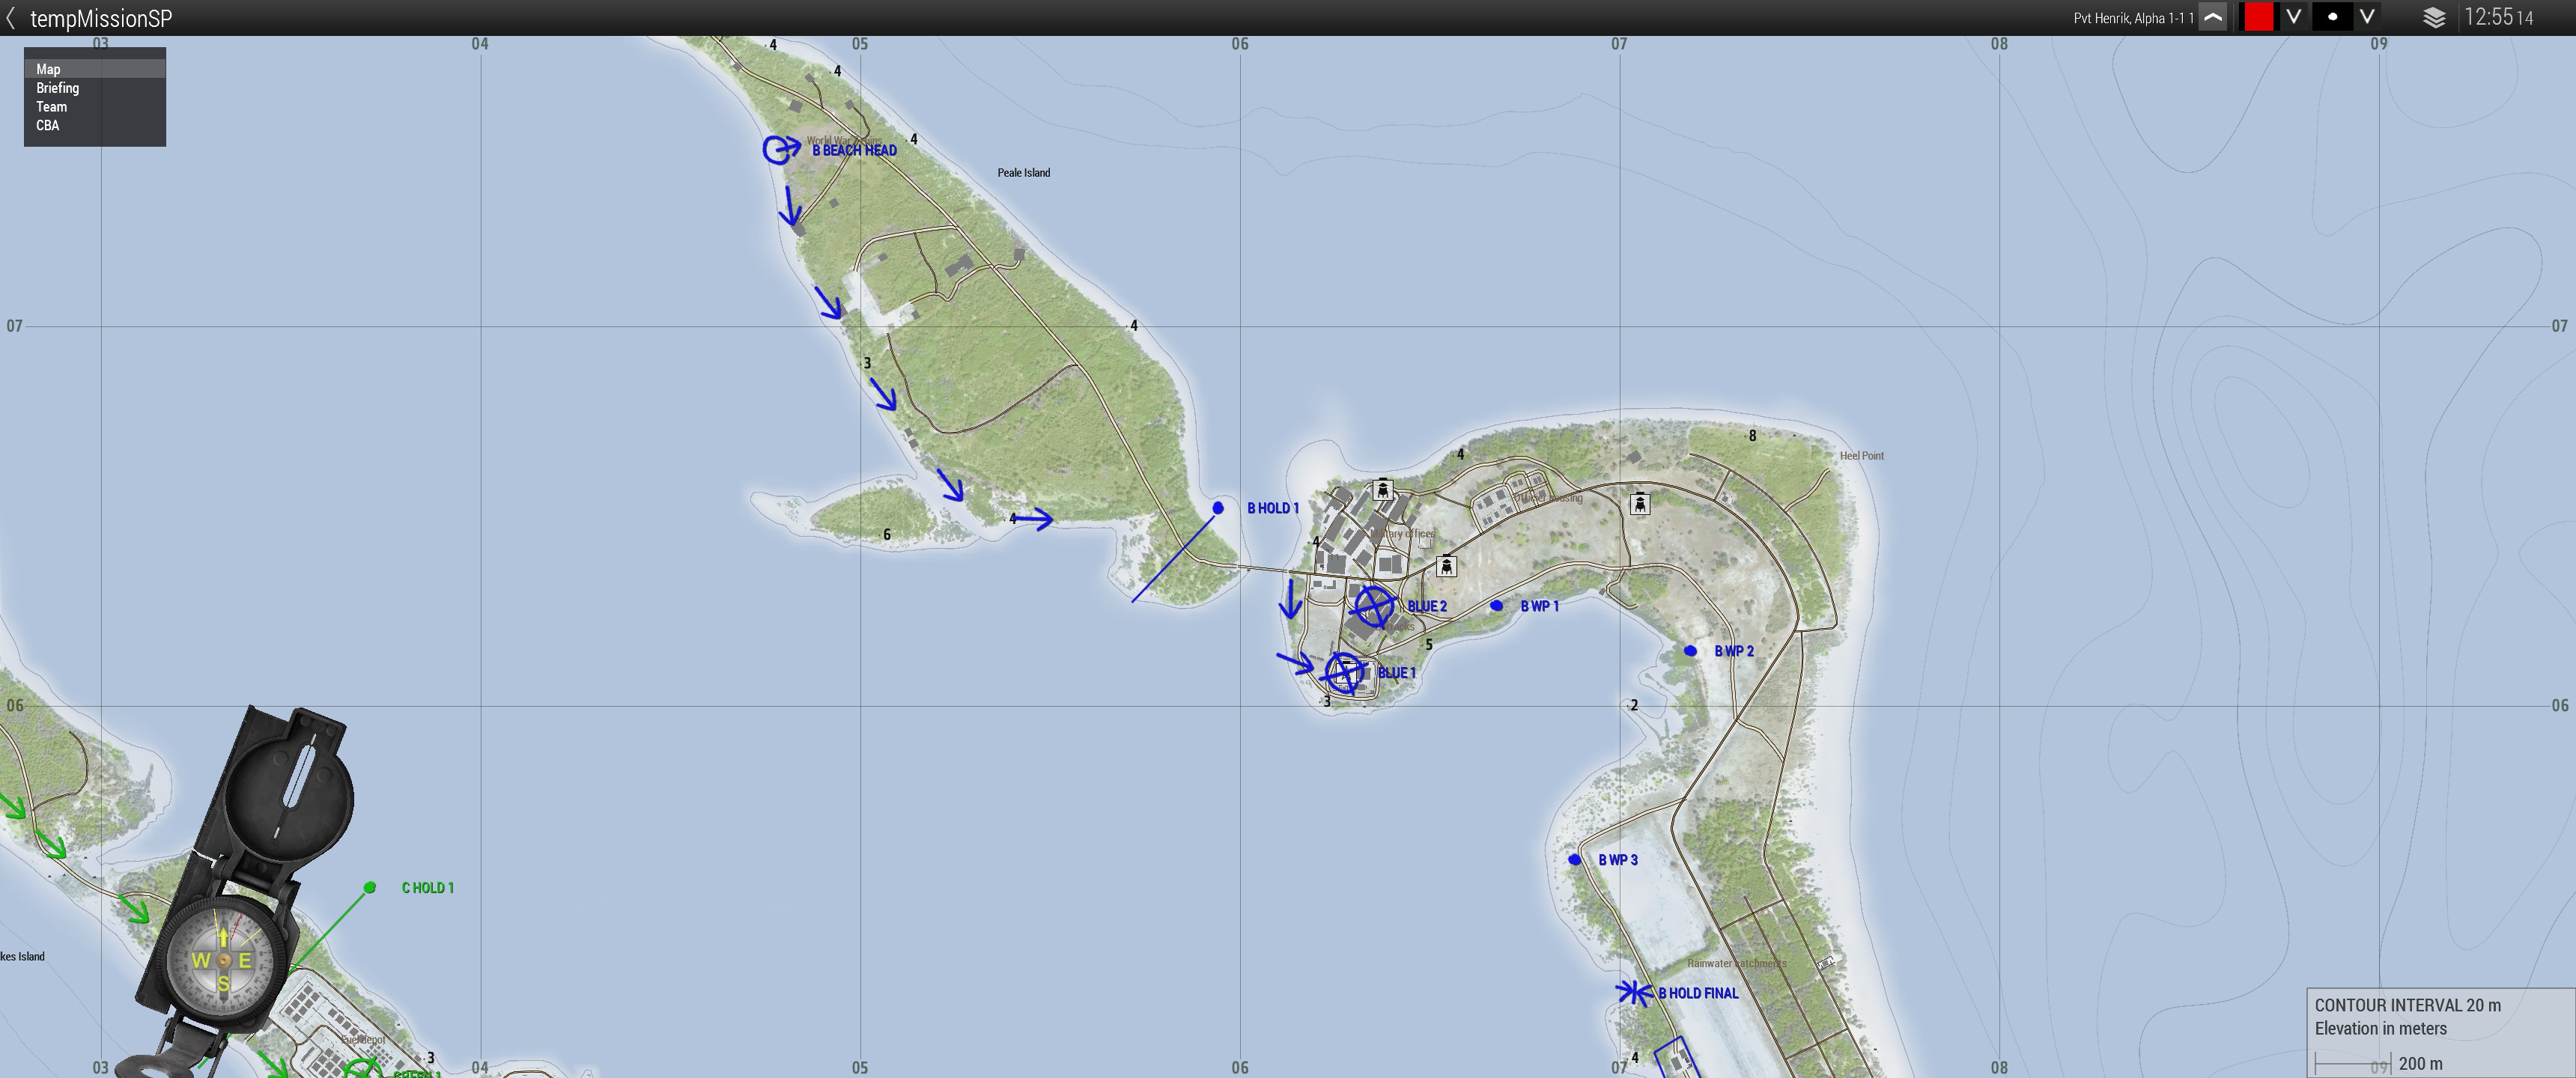
Bravo AO:
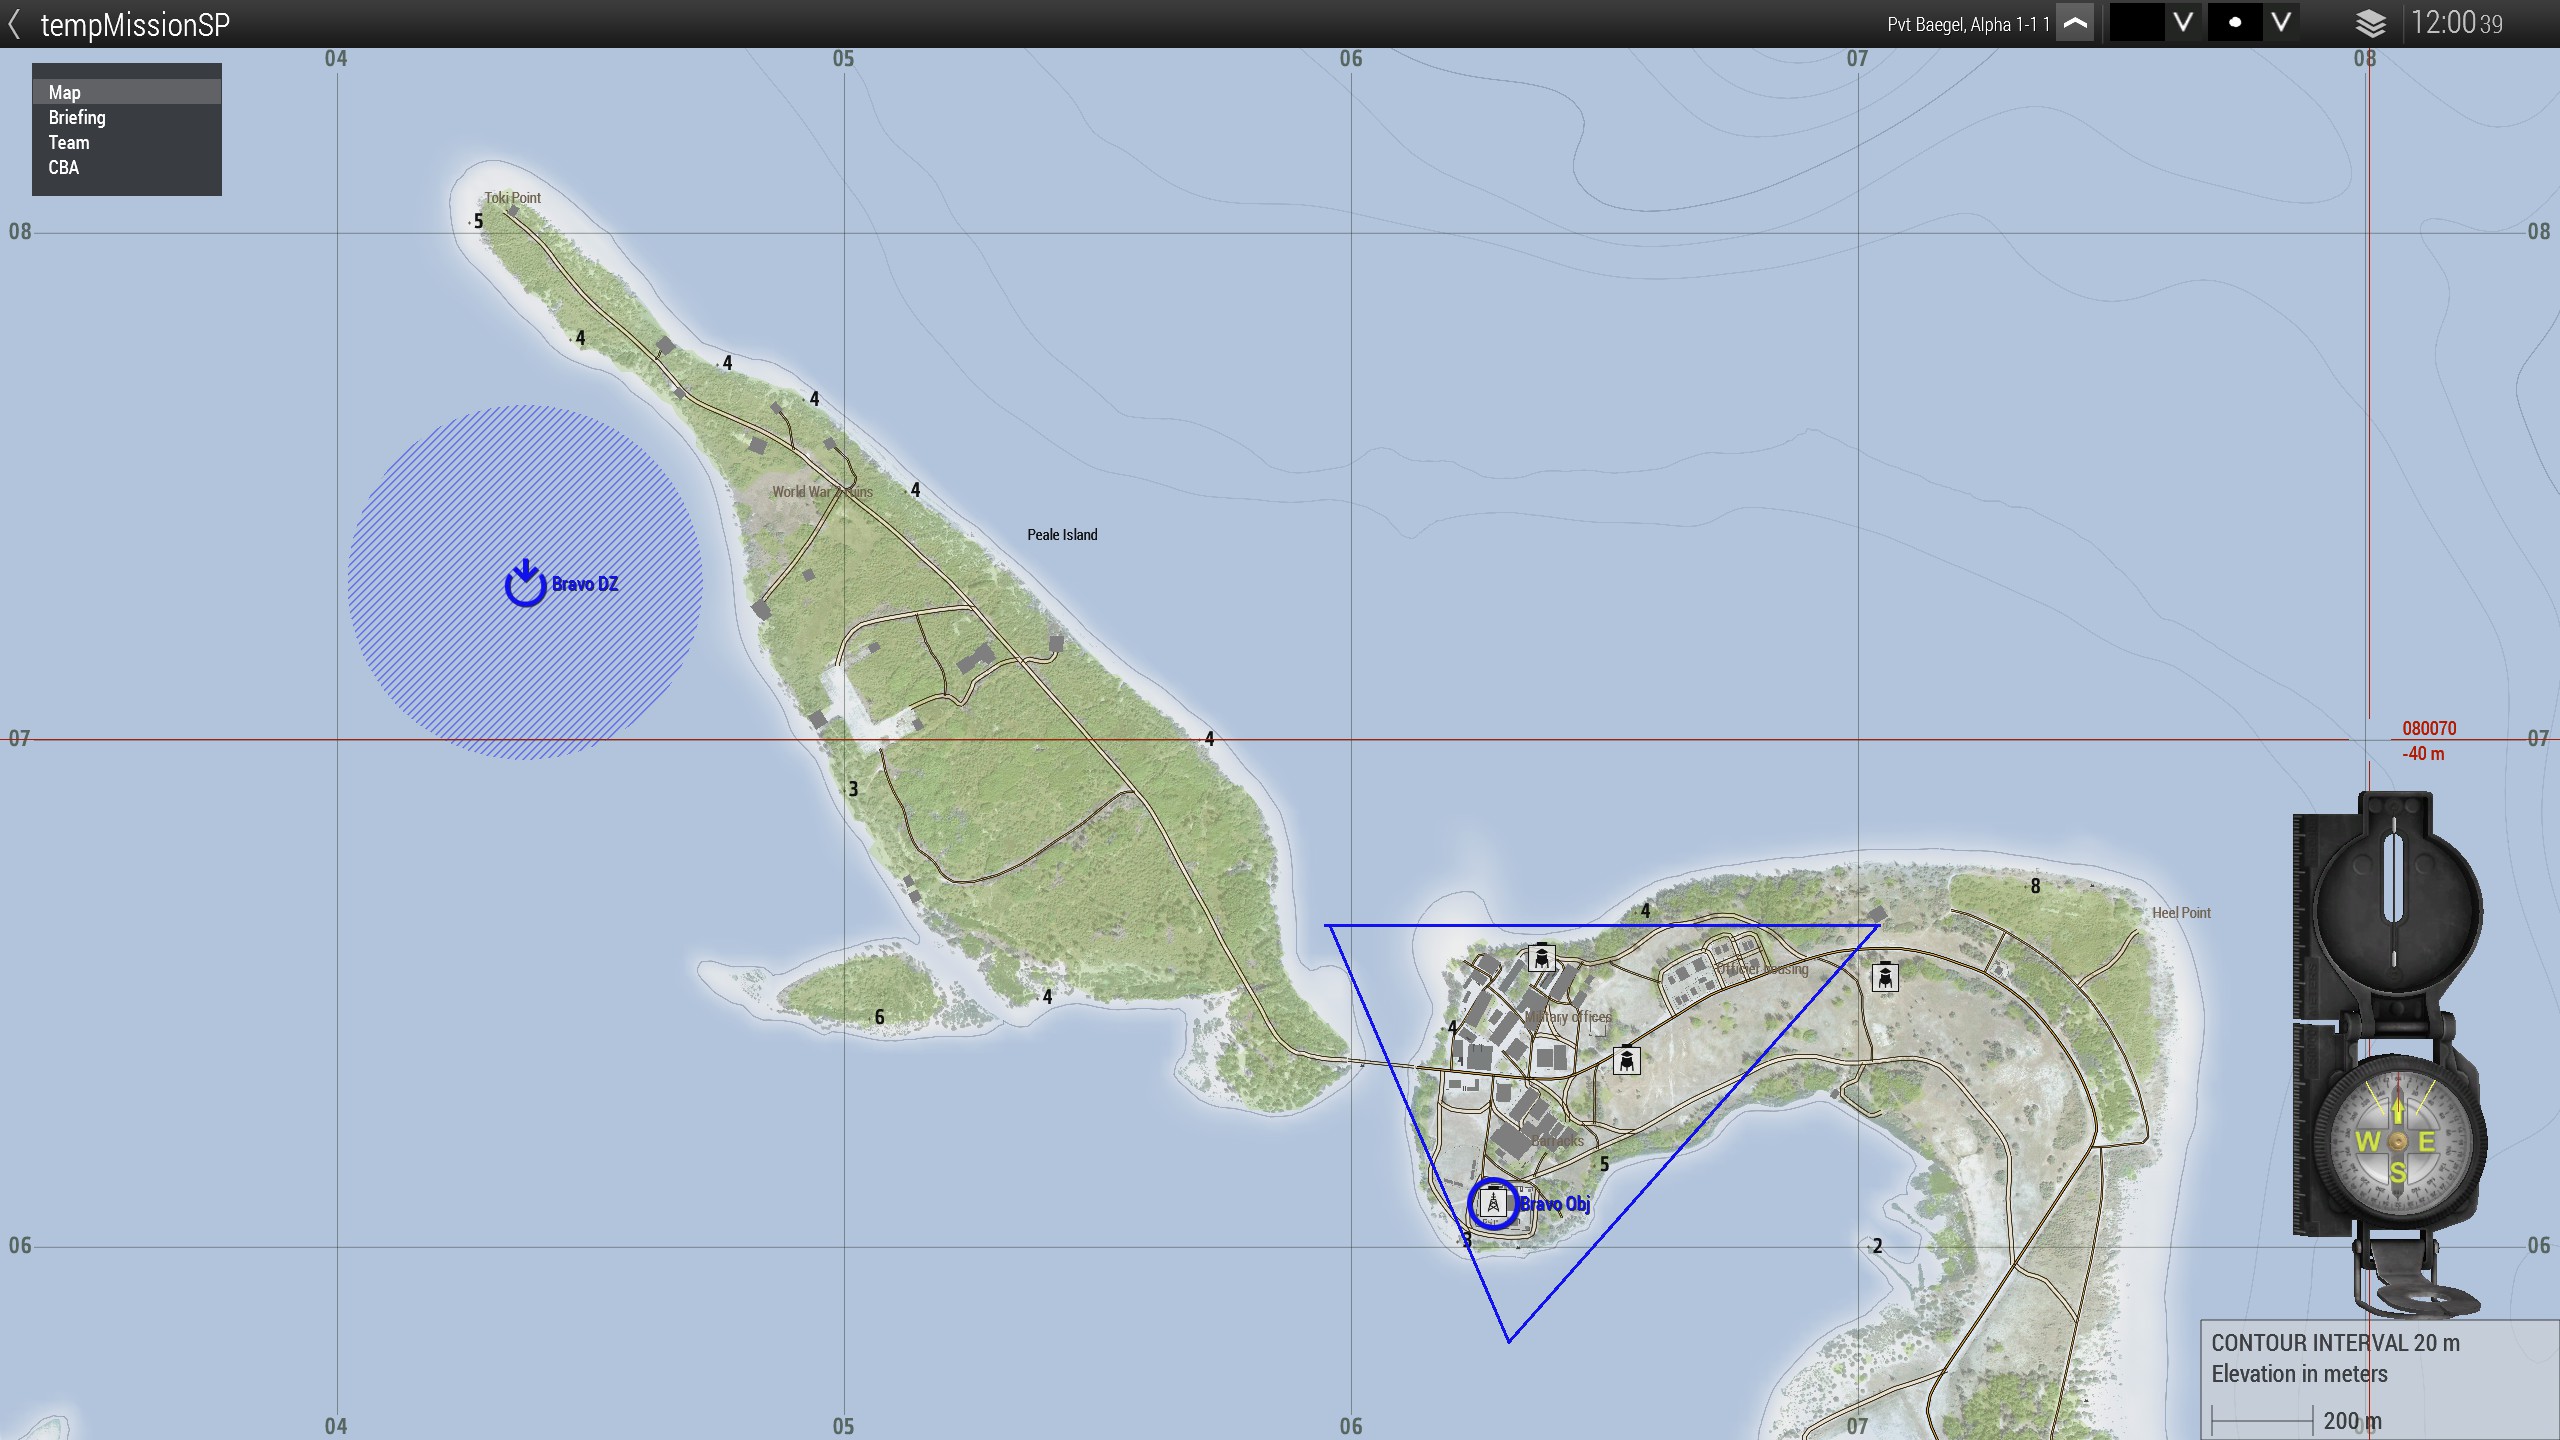
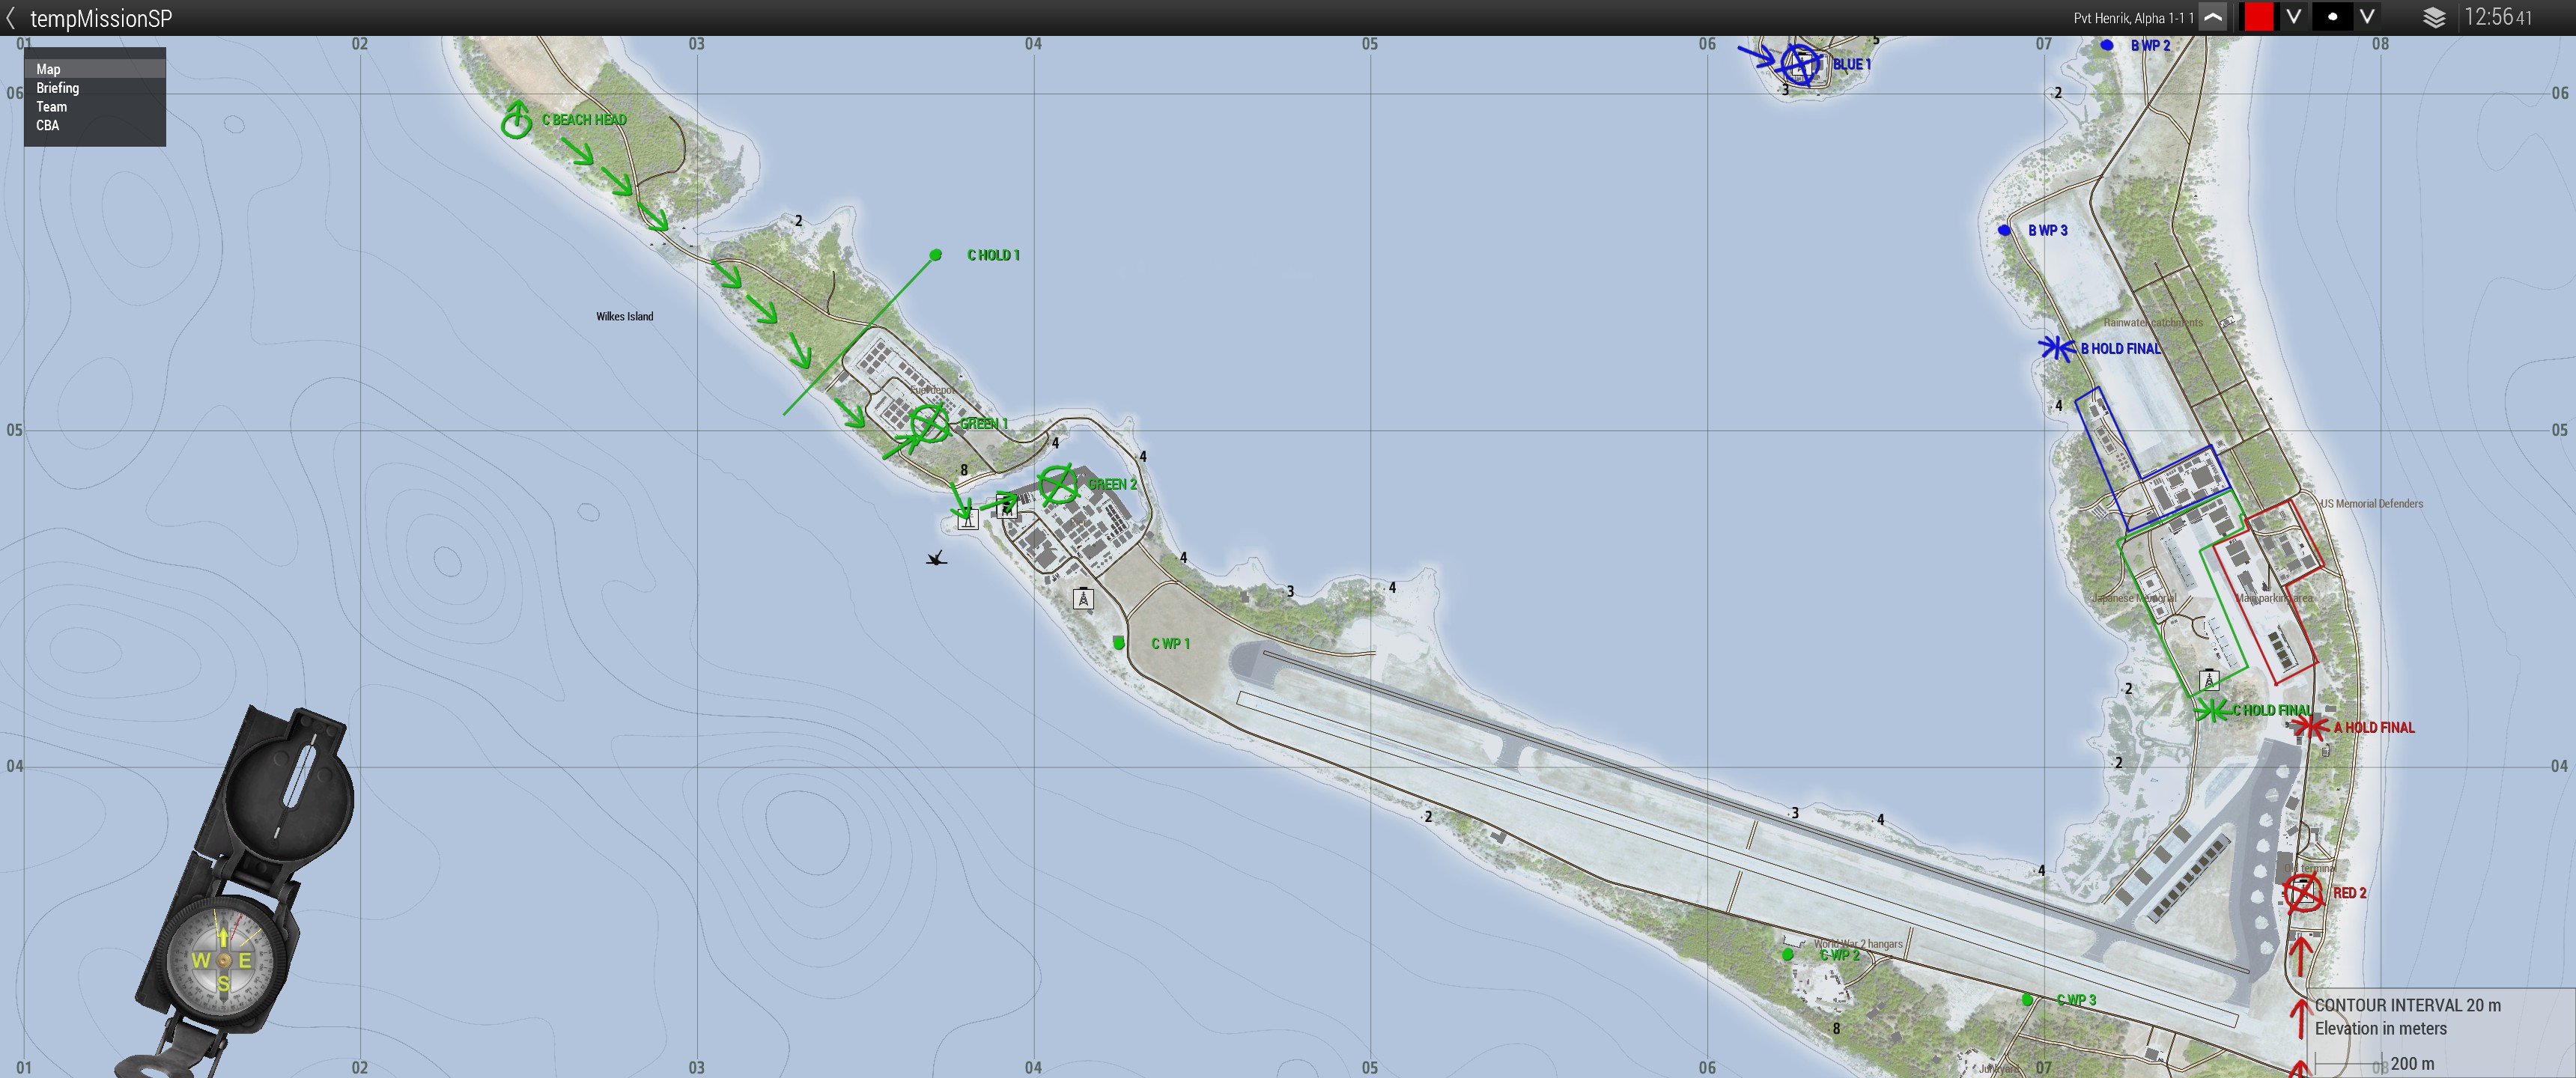
Charlie AO:
Main Objective AO: