Map: Shapur
Time: 1400 hours, November 30th 1942
Weather: Clear
Host: [user avatar=“https://assets-cloud.enjin.com/users/2509934/avatar/small.1584375752.gif” name=“Baegel”]2509934[/user]
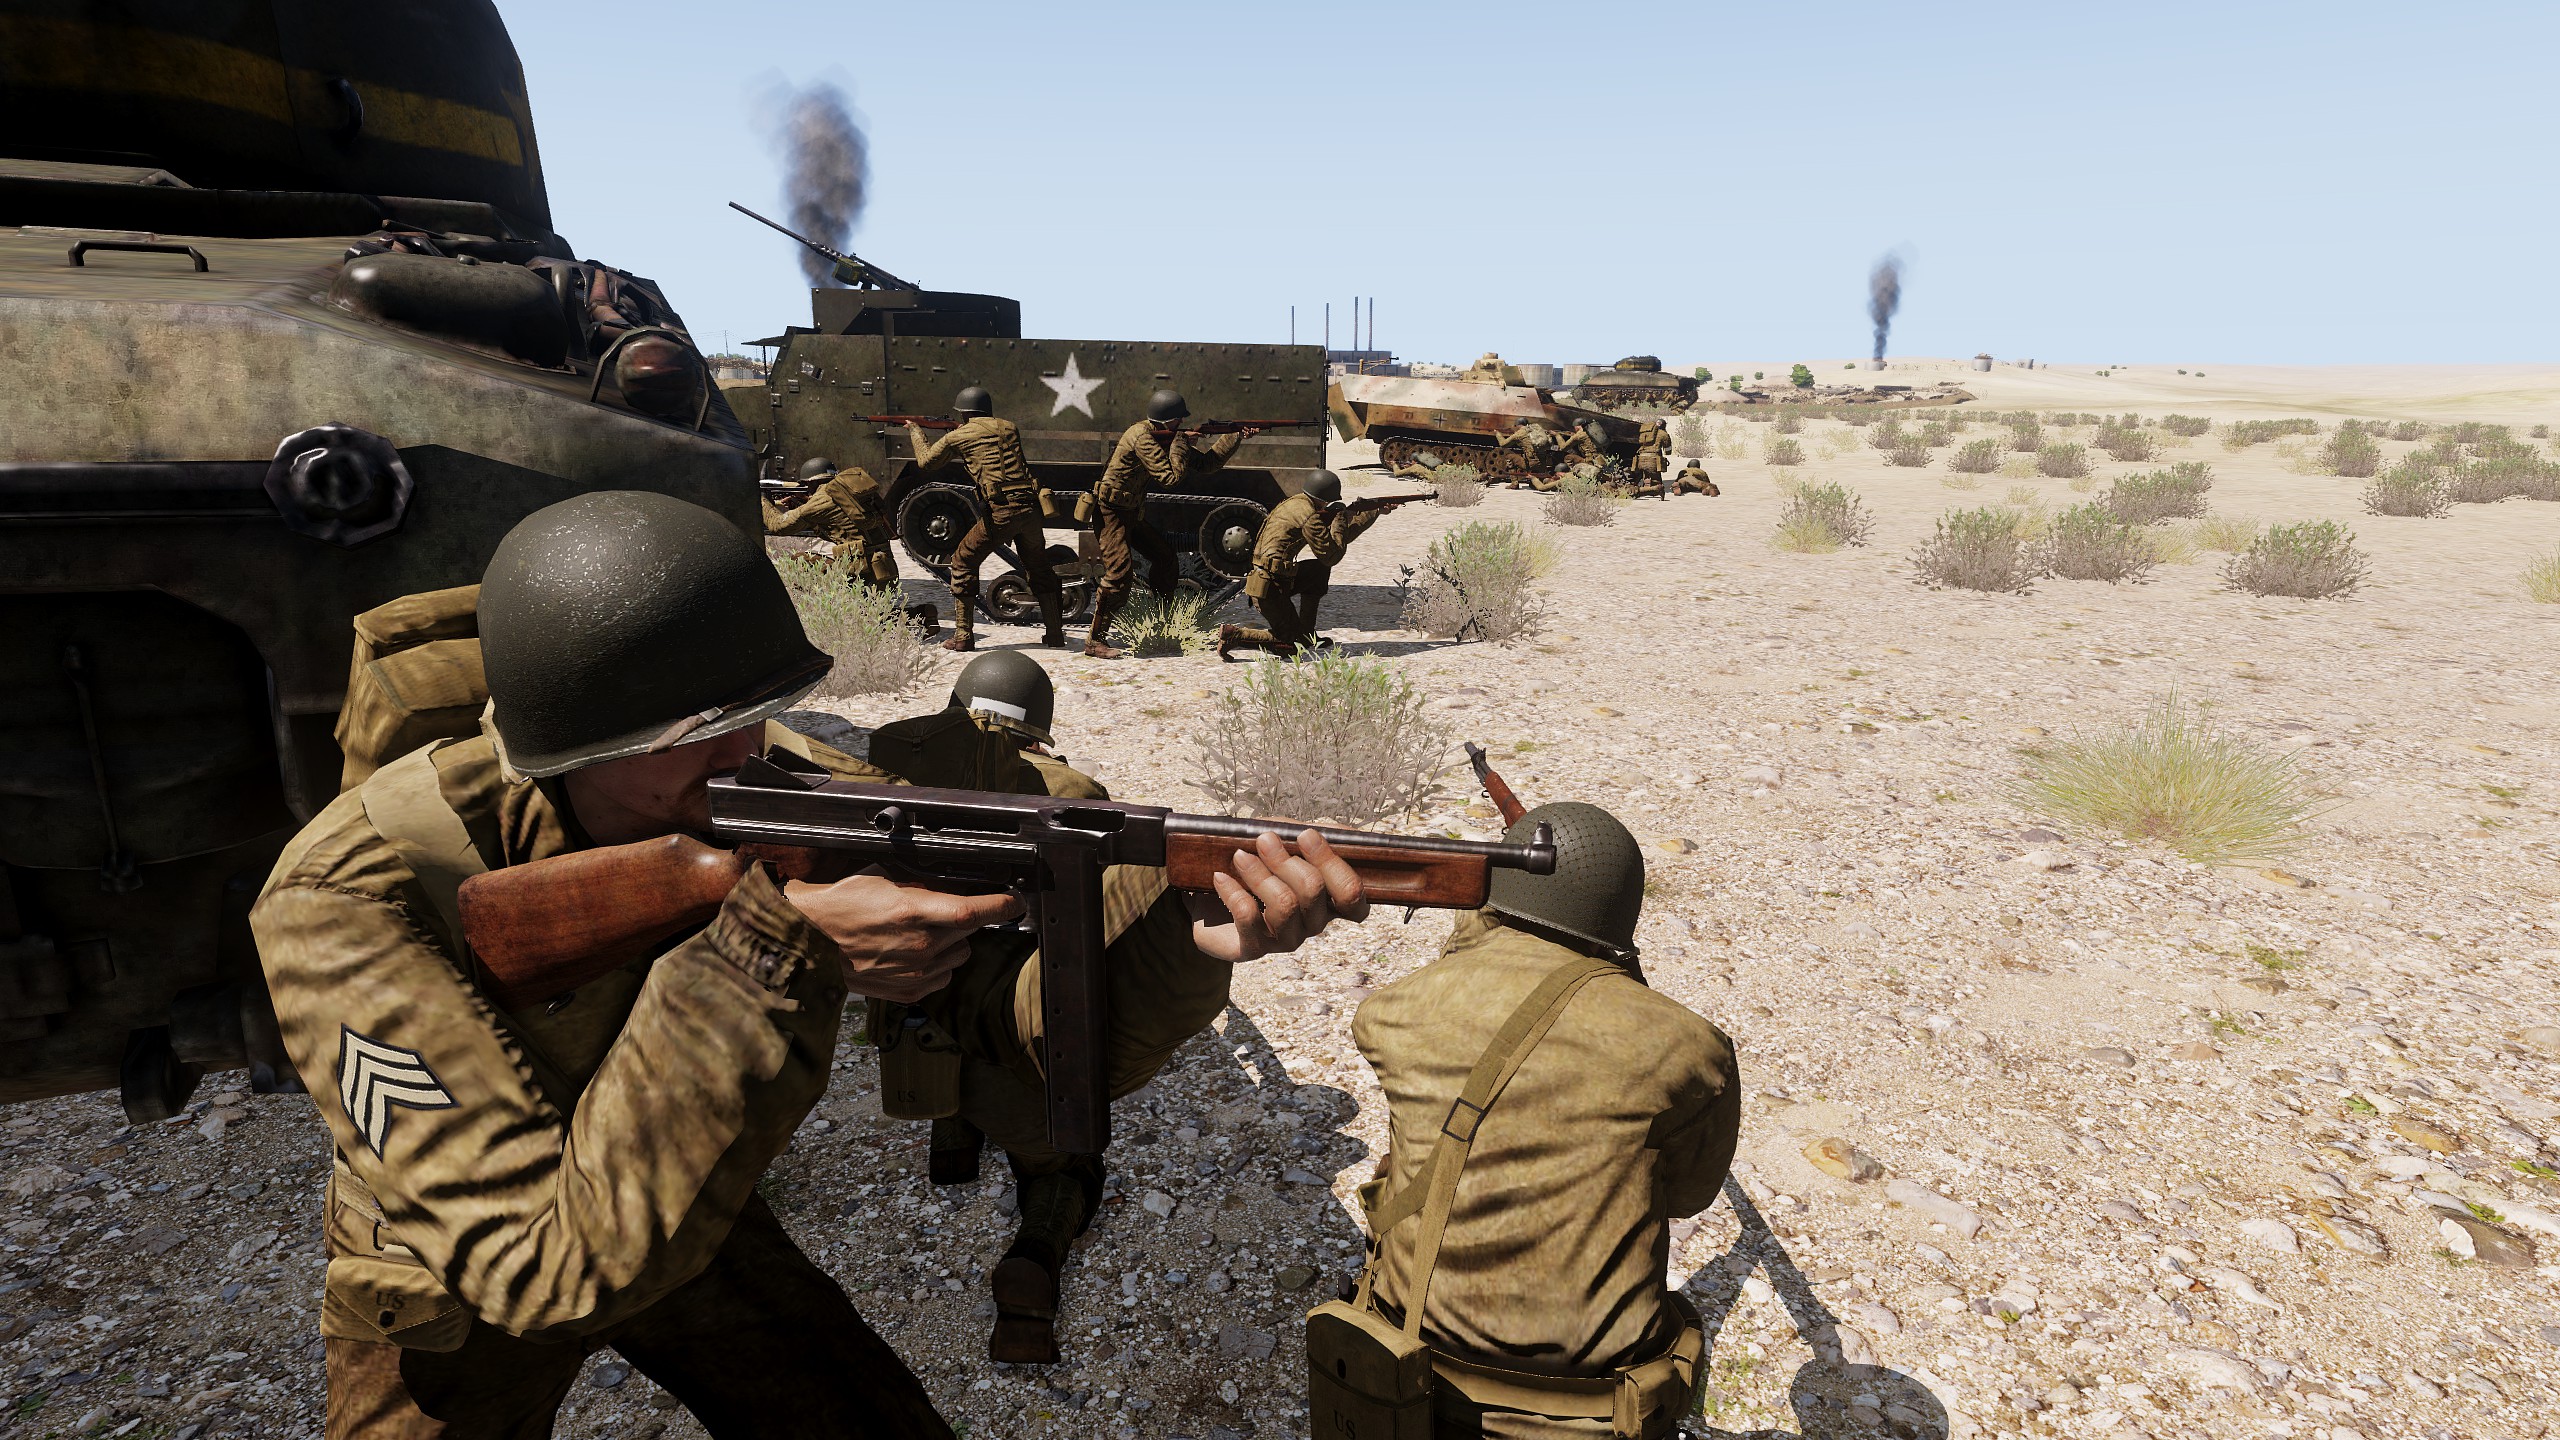
The 1st Infantry Division has been deployed for the first time in the European theatre of World War 2 and has made steady progress on the African stage. You are now in the final stages of Operation Torch, having met little resistance from the Vichy French up until now. But this is Tunisia, and you are facing the battle hardened Deutsche Afrikakorps who are desperately fighting for their last fuel supplies and airfield in the region.
OPORD
I Situation:
1st Infantry Division, 16th Infantry Regiment, 1st Company, 2nd Platoon is to push alongside the 3rd tank platoon and 1st infantry platoon into and over german defenses around the town of Shapur. Your final objective is the DAK airfield on the other side of the town, code Able.
Friendly Forces:
[indent][list]
[] 1st Infantry Division, 16th Infantry Regiment, 1st Company, 2nd Platoon
[] MAT and DGR highly recommended, ENGRs optional
[] 1st infantry platoon and 3rd tank platoon
[] 3rd tank platoon will be dealing with tank targets but can be called under callsign Rhino. [/list][/indent]
Assets:
[indent][list][*] Standard Assets
[/list][/indent]
Enemy Forces:
[indent][list]
[] Deutsche Afrikakorps, 15th Panzer Division
[] Expected to hold their ground and attempt to repair their fuel lines in order to get the Luftwaffe airborne. Counter-attacks possible.
[/list][/indent]
Civilians:
[indent][list]
[*] None
[/list][/indent]
II Mission:
2nd Platoon is tasked with assaulting the DAK trench line (Tom) and push through secondary objectives and the town of Shapur in order to capture the airfield (Able).
III Execution:
Commander’s intent
[indent][list]
[] 2nd Platoon is to assault the DAK trench line and regroup.
[] Once regrouped at Tom, PLT is to form a plan of action on taking key secondary locations in Shapur and how to push forward towards objective Able.
[*] Once the secondary objectives are taken, PLT is to push forward and capture Able and hold it.
[/list][/indent]
Movement Plan
[indent][list]
[] PLT has to take objective Tom in order to push forward to other objectives.
[] Subsequent movement decided by PLT
[/list][/indent]
Fire Support
[indent][list]
[*] DGR, 3rd PLT[/list][/indent]
IV Administration / Logistics:
Resupplying
[indent][list]
[*] Resupply is located at the forward observation bunker the 1st Infantry captured an hour ago (At respawn).[/list][/indent]
Reinforcements:
[indent][list]
[] Reinsertions will be on the hour every hour and be adhered to strictly, no deviation is allowed.
[] Reinsertions are the same for all, including vehicles teams.
[] Platoon Commander has a one time reinsertion wild card at his disposal call this in through HQ.
[] At predesignated times, reinforcements will be sent out of the base in smallest transport vehicle which can hold reinforcements
[] At predesignated times, an air transport will be sent out to pick up reinforcements from the base
[] At predesignated times, an armed escort vehicle will be sent out to escort reinforcements from the base
[*] Upon insertion to the AO, reinforcements should stick together until regrouping with the main force in the AO[/list][/indent]
Area of Operations:
Friendly Forces:
Fill order:
able (alpha) [10]
PLT [11]
Dagger [14]
MAT [18]
PLT: Medic, Marksman Sergeant, Mortar [22]
Fill: Engineers
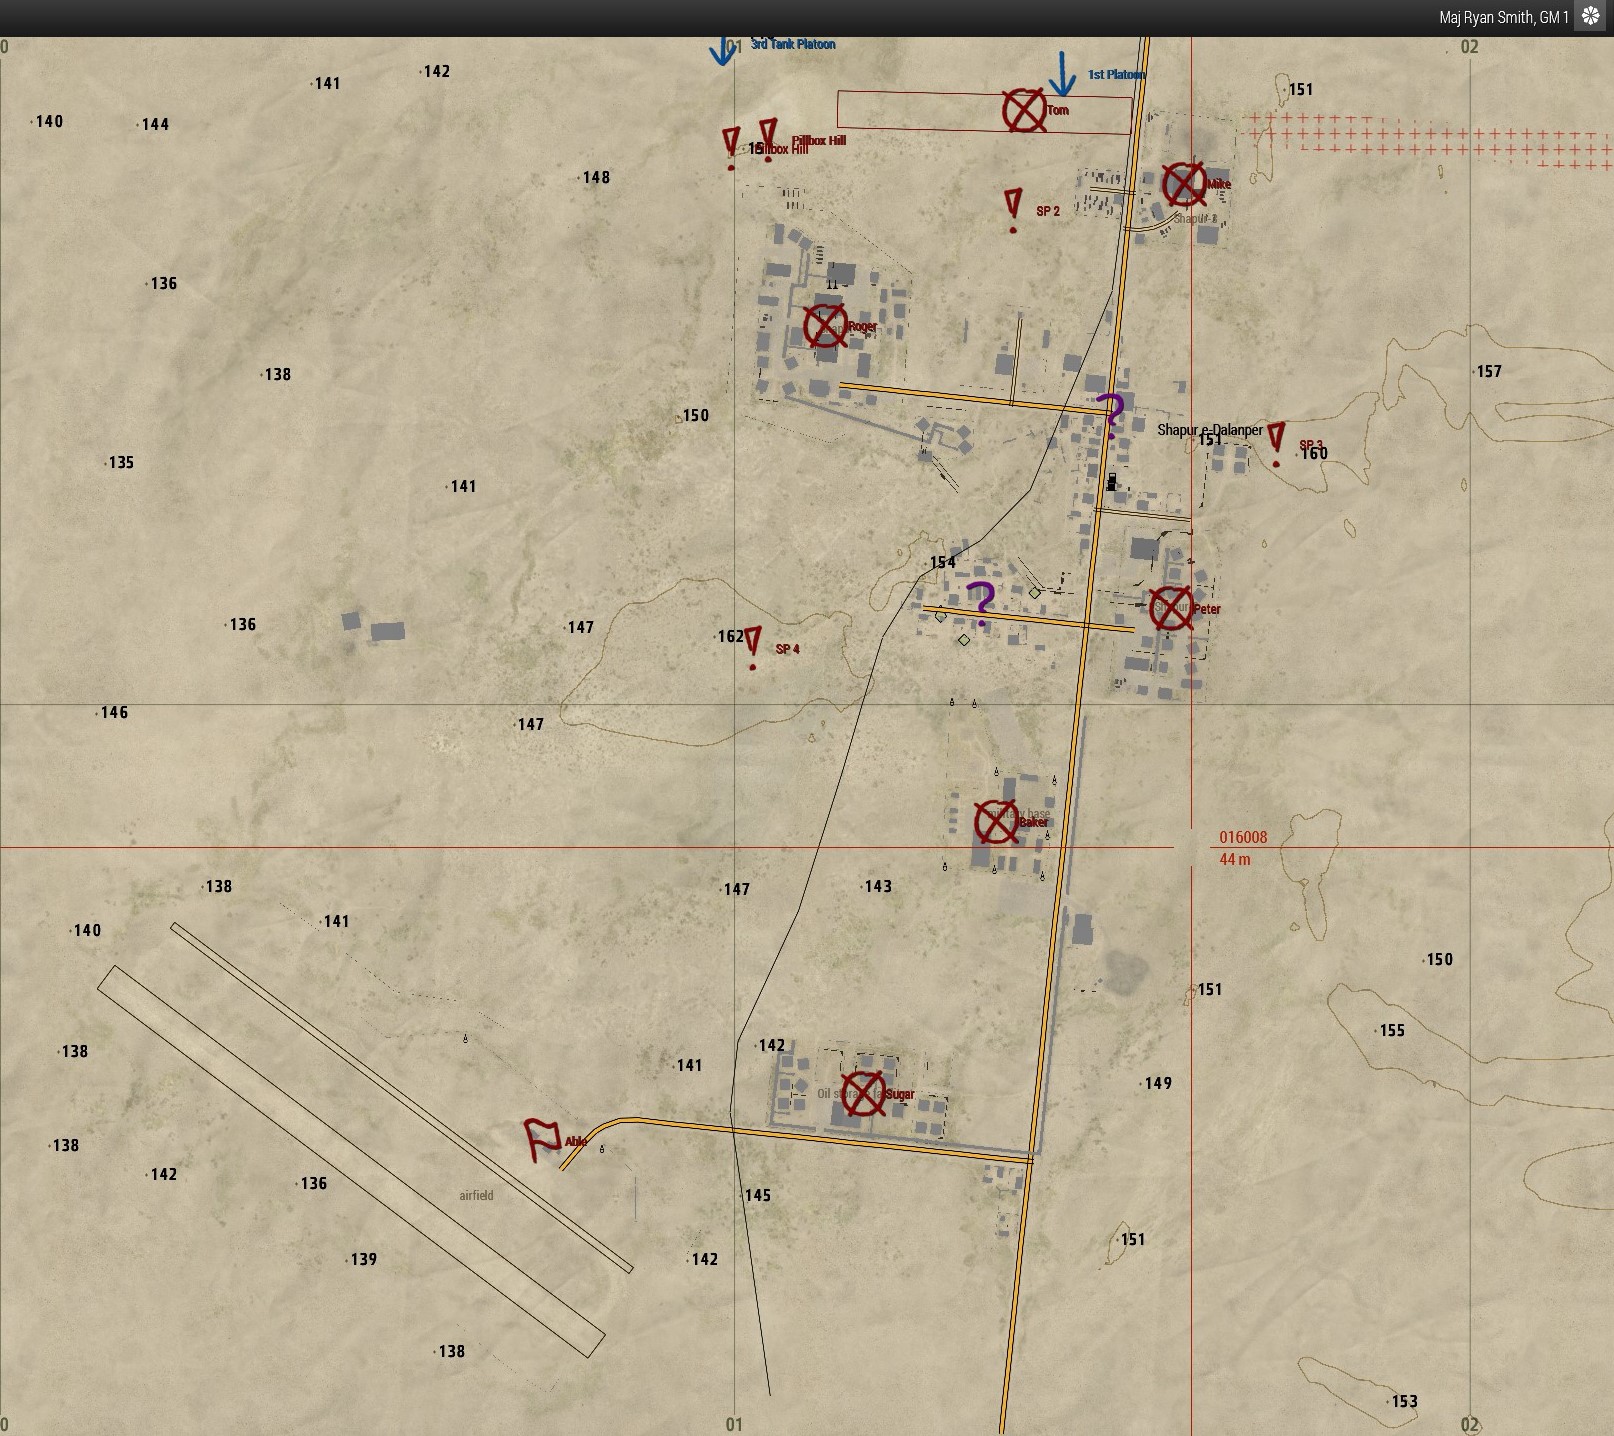
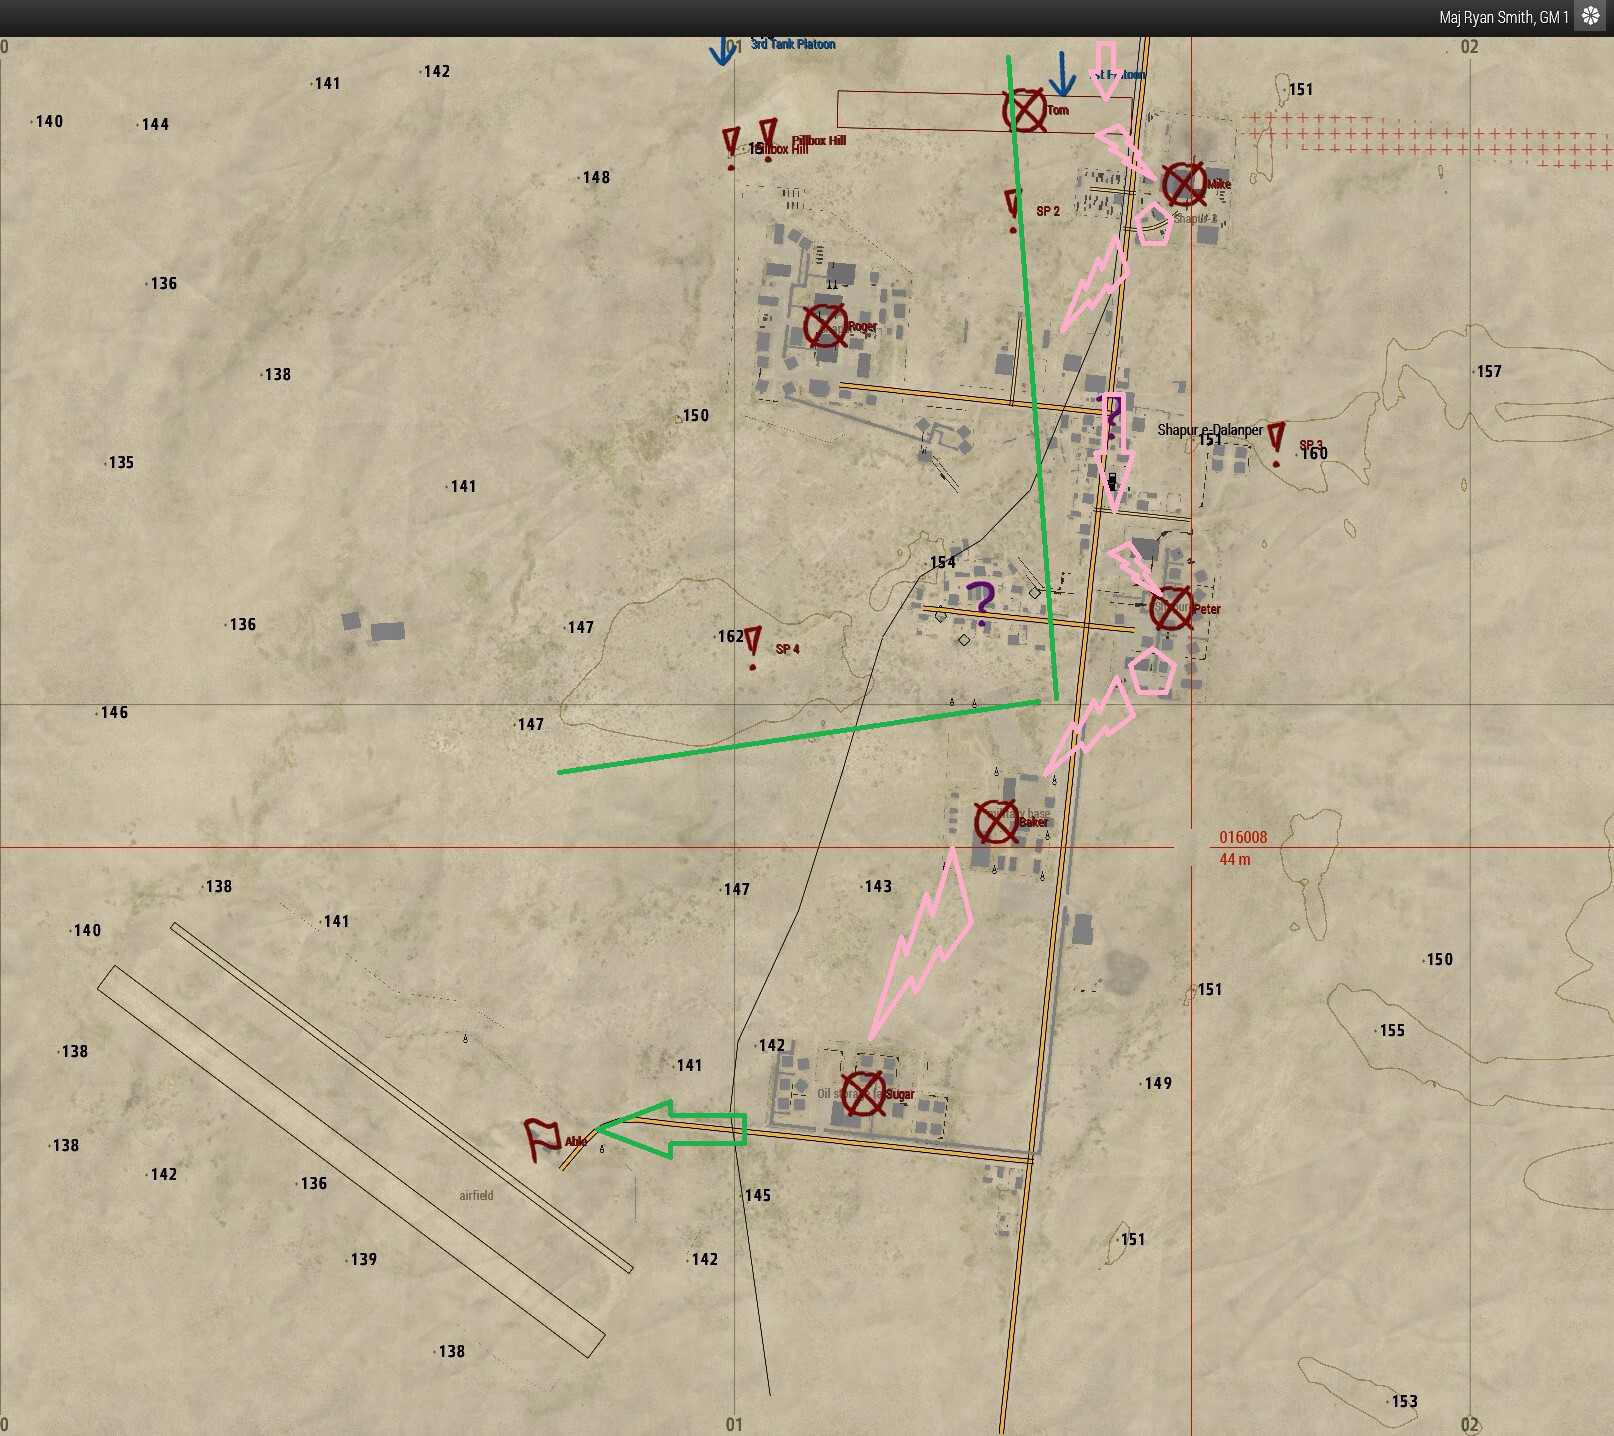
Objective Tom isn’t mapped, and so planning for it will be difficult. But broadly, one will want to clear trenches from one end to another. Given the indicated starting position of our unit and the tank platoon, starting on the east side would be best, and then working our way west. The tank platoon will provide passive pressure on the west side, and can "strafe" it if needs be. PLT and MAT will provide pressure on the east flank from Mike.
We will then move on to the pillbox hill from the east, and then to objective Roger. MAT will move to the pillbox hill before Able engages and clears Roger. Once Roger is cleared, Able will move via the trench network to clear Mike, relieving PLT.
With the initial objectives clear, Able will advance with MAT around the eastern edge of the town towards Peter. MAT should occupy a building to overwatch the main road for any response forces or vehicles in general.
Approaching Baker will require a decision. The map shows a pipeline running on the opposite side of the road. This should be good cover for advancing to the eastern flank of Baker. However, it may be raised or otherwise unsuited. In that case, smoke grenades will have to be used to gain that ground. A simultaneous strafe from Rhino on the west side would be advised.
Similarly, the pipe could be used to approach Sugar, and occupy the small town nearby as cover for PLT and MAT to overwatch as Able assaults.
Controlling the airport should be fairly simple. Since the airport is surrounded by flat open plains according to the map, the main threat will be vehicles, any infantry approaching on foot should be quickly cut down. Engineers, if present, can fortify the area. MAT will remain in the village near Sugar, to watch the crossroads for vehicles. If bothMortar and Sergeant is present, they can also reside with MAT. PLT and Able will remain in the airport buildings, using Rhino to take out any vehicles that approach from the west.