Leave feedback, videos, pics, dead people all the good stuff ![]()
couldn’t see what was shooting at us most of the time. They seemed to know exactly where we were no matter what side of the walls we were on or through how many bushes. My theory is the radar somehow told the AI where we were at all times but that might just be me trying to justify the ai’s mystical ways
I’m not aware of the radar facility directing enemies tbh, might be the map with some weird buildings. Didn’t touch the AI skill at all, but it’s always quirky in CQB unfortunately
I did not experience that issue at all. HAT surprised the majority of them before they even knew where we were.
I mean that makes sense since I got 65 kills. I was able to shoot he majority of that in transport choppers (maybe?) But the majority of my gun kills were surprise kills on the enemy.
they may have been distracted turning alpha into ground meat
It was my first time playing Alpha lead in a very long time, and I definitely made some mistakes getting back into it. First of all I hope everyone in Alpha had a good time. It was a very hard op to begin with and we took the most casualties we’ve had since the xmas op (according to stats page). I myself was extremely lucky this op (like beyond reason, around 4-5 times I could’ve died because I was in a bad spot but somehow survived), but I hope those that died and didn’t get a quick reinsert still had a good time.
On the op, I thought it was very nice. The airport was cool and I quite liked the objectives in town as well (like capturing bridges).
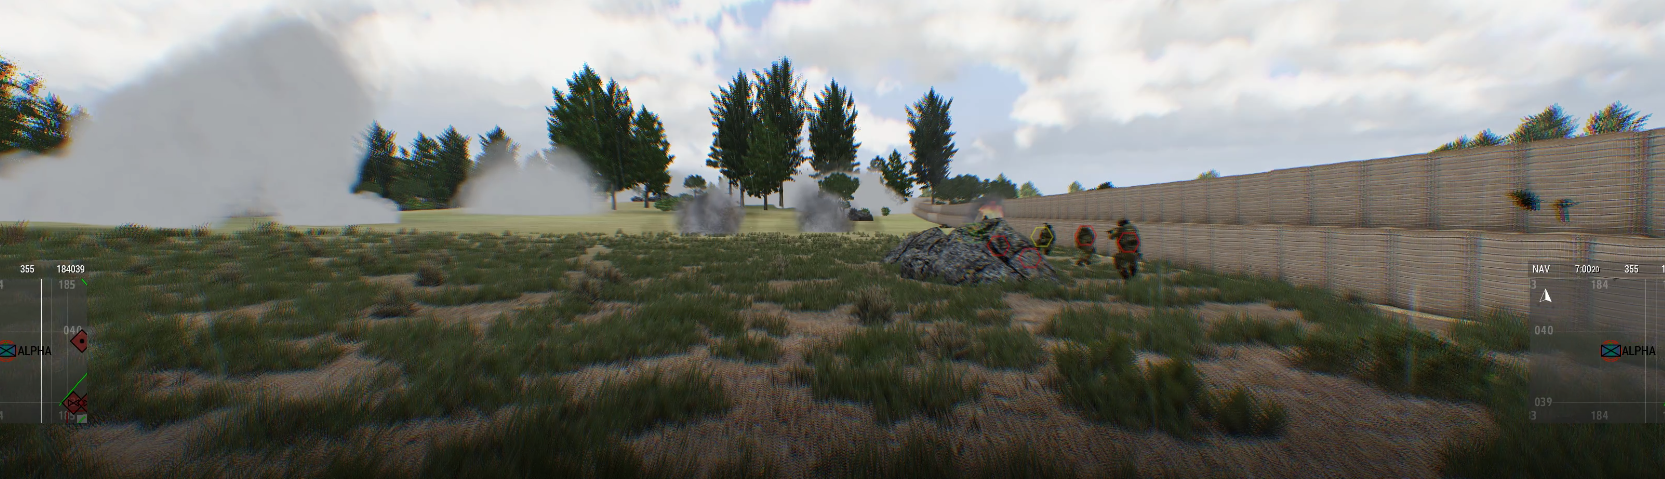
The airport assault went very well I think. The pace was pretty high until we took casualties from the building collapsing on 3 of my guys in yellow. Apparently MAT was trying to warn me on longrange, but I missed it because I was trying to get red’s wounded away from a spot where they were getting picked off. Things went bad when we were told to support MAT who were having trouble west oft he airfield, I saw they were positioned in the open on the map and assumed that they’d only be there if they had good cover from rocks or trees. Therefore my logic was we’d also find that after scaling the walls on the west of the airfield, which turned out to be wrong. We tried to retreat from the position and probably would’ve made it without casualties, until we got lit up by a GMG.
Alpha heroically charging towards MAT’s rescue.
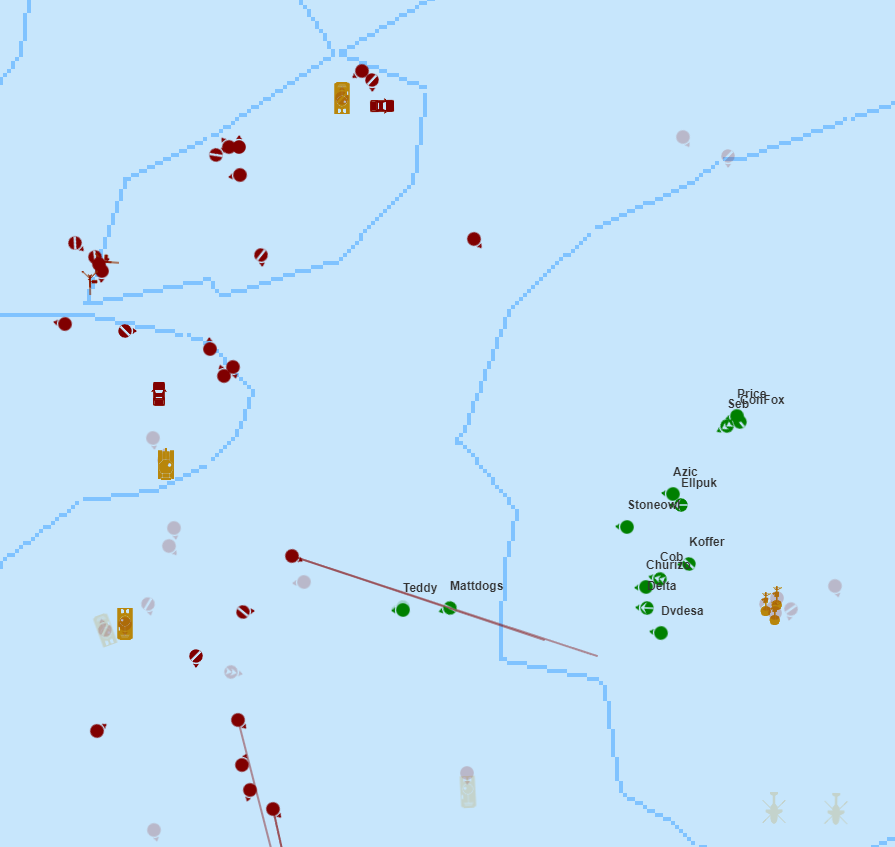
Alpha trying to retreat but getting caught by a GMG.
Much later, we found one of the positions which was hitting us.
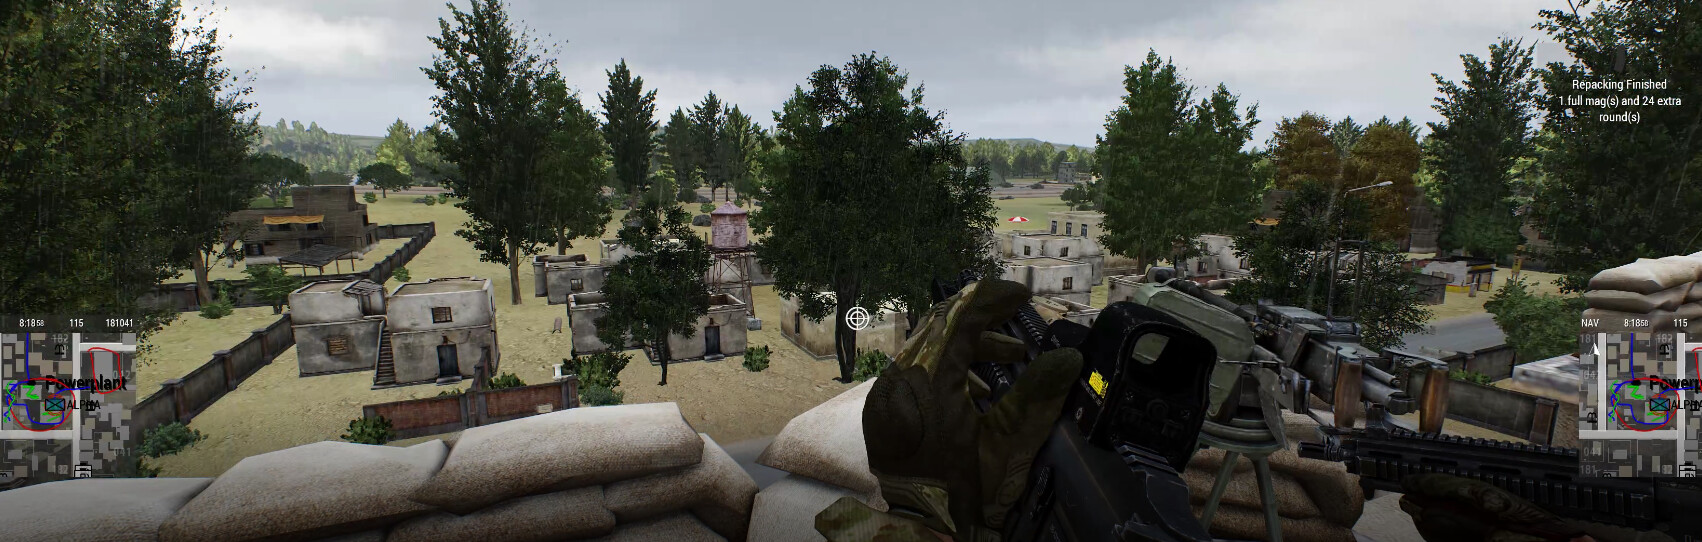
After regrouping we assaulted the town from the south. The fireteams did a really good job here as we swept through the town and took the first objective while the rest of PLT was struggling. The ease with which we took the southwest of the town and the first bridge made me overconfident and I had red team start the assault on the second bridge without any support. This unfortunately cost us as it was much heavier defended than the first bridge, leading to some unnecessary casualties for Alpha.
After this we pushed east into town, right into the center of the enemy formation. Once PLT realised this, we were told to clear the south of the formation so that we could then shift all focus north. However, both my FT’s were already in the midst of it and it took a while to regroup and treat a lot of wounded.
Once we stabilised we went south and cleared the powerplant and road, though it wasn’t easy. After we regrouped at the bridge the next task was to take the bridge. At this point Alpha was down to 7 people, and the whole PLT to 11. I knew the chances of taking the bridge with our limited numbers were slim. However, it was like 22:50 at this point and given the choice between waiting 15 minutes for reinforcements, or performing a heroic charge to take the bridge I of course chose the latter. (This is also the reason why I rushed my people so much at this point, I didn’t want them to have to sit out the rest
of the op if things turned bad on the bridge, which they did). I actually forgot to record half of the bridge assault and retreat, which is a real shame since it was a pretty epic charge and retreat. We lost 3 people (who fortunately did get a quick reinsert), but I’m surprised it wasn’t more since it was really difficult on there. There were VSS snipers with Italian accents on the other side.
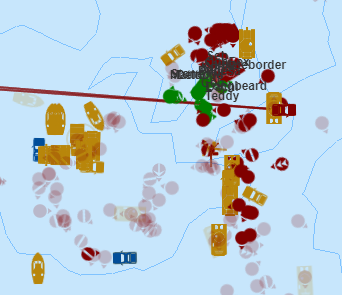
Last objective red team did a very nice flank in the town and really the objective went very smooth.
For myself I noticed I got some improving to do on the radio when things get hectic, as I regularly stopped executing proper radio protocols. Also I might take some fewer risks. For my FT’s they should’ve marked cleared sections more on the map. Almost nothing was marked green on the map, except for what I marked myself. This made it hard to know exactly what was cleared, but also to know exactly where my FT’s were when I didn’t have LoS (like in town often happened). Just following a trail of green dots or squiggles already gives a lot more information.
The GMG was a mistake from me, I wanted to put down yet another 50 cal technical but somehow clicked on the wrong asset. Apologies, took me a solid 3 minutes to realise what was slaughtering you before making up for the mistake.
You guys seemed to have much less of a trouble going through the town than what I expected, but you also took significant casualties because the movement wasn’t great. Remember to consolidate units in CQB action and setup good security around you, because visibility is very limited. You guys had a moment when a medic was treating a wounded player and nobody was on security, while an enemy fireteam was just around the wall. Maybe proceeding at a slower pace and identifying proper routes of movement would help.
EDIT: I know it’s easier said than done, but CQB training was kind of the objective of this mission